Discover the
Modern
WordPress with WordVell
The 20-Step Proven Strategy to Become a Full-Stack WordPress Developer
Learning WordPress without a strategy is the fastest way to waste time.
Most aspiring developers jump from one tutorial to another, acquire skills in the wrong order, and still struggle to confidently build real-world projects.
The truth is that in order to become a full-stack WordPress developer without wasting time and effort, you require a structured approach, not a random learning path.
That’s why this guide introduces a 20-step proven strategy followed by us and many others in our circle.
This guide shows you exactly what skills and tools you need to learn, in the right order, with practice projects.
You’ll discover how to move from core WordPress fundamentals to advanced development, security & performance optimization, and avoid common learning mistakes to build a successful career.
Whether your goal is freelancing, high-paying jobs (remote or onsite), or building your own digital products, this guide gives you a focused path to achieve real results.
Foundation: Core Skills Every Web or WordPress Developer Needs
Before starting WordPress development, you need a working knowledge of HTML, CSS, basic JavaScript, PHP, and MySQL because without these, you won’t be able to develop themes, plugins, and Gutenberg blocks.
Think of WordPress like a house; if the base is weak, everything will collapse.
That’s why your first step is to master the core web skills needed for WordPress.
Step #1: Learn HTML, CSS, and JavaScript
HTML, CSS, and JavaScript form the core technologies used to build almost every website, including WordPress sites, because they provide structure and styling essential for web pages.
Learning these technologies first is crucial because they form the foundation for all subsequent WordPress development tasks, such as creating and designing pages in themes and plugins.
HTML
HTML is the standardized markup language used to structure content on web pages, forming the backbone of all web development.
W3Techs data shows that HTML is used by 97.1% of all websites whose markup language is known.
Every element you see on websites, including titles, content, forms, and images, is created and deployed through HTML.
Similarly, in WordPress themes and plugin development, you also need to create web pages, where HTML is required to add various elements like headings, paragraphs, images, and forms correctly.
CSS
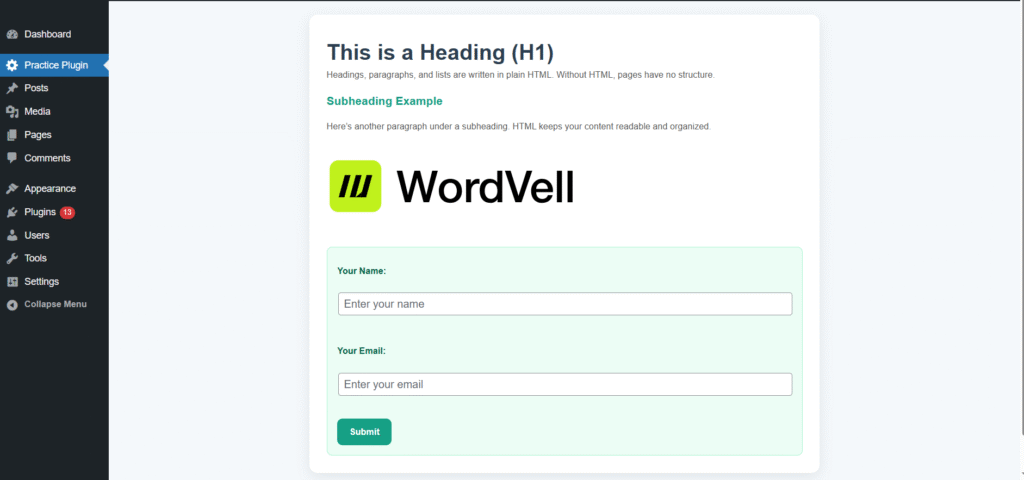
Once the HTML structure is in place, CSS is used to style the page, such as controlling layout, colors, fonts, spacing, and responsiveness.
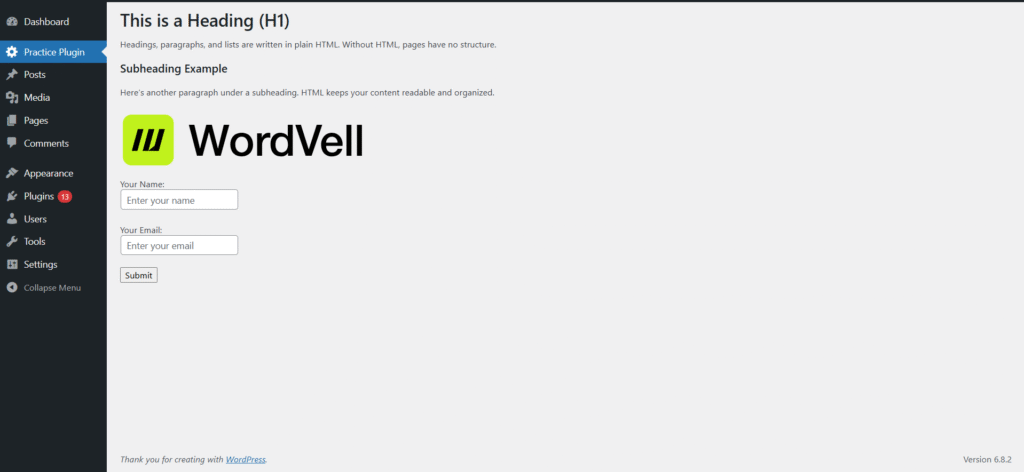
Because no one likes ugly pages like the above one.
So here comes the role of CSS, which transforms plain HTML into visually engaging pages.
Look at the example below that how CSS transformed our ugly admin page in our plugin into a visually appealing page.
Javascript
After this, the role of JavaScript emerges.
JavaScript is a programming language that is used to add dynamic content or define the behaviour of web pages.
It is used for several purposes, like
- Live validation and submission of forms with page reload.
- Dynamic content updates without page reloads (e.g., infinite scrolling, live search results).
- Interactive menus, carousels, and animations.
- Adding functionalities based on user input and events (clicks, hovers, key presses).
- Manipulating HTML and CSS to change the appearance and structure of a page.
You can realize the importance of JavaScript in WordPress, as WordPress co-founder Matt Mullenweg says in a WordCamp talk:
“Learn JavaScript, deeply.”
Practice Project for You:
Build a simple project that comprises a responsive landing page with a hero section, services grid, and contact form without WordPress yet.
Step #2: Learn PHP and MySQL:
After basic frontend skills, PHP and MySQL become necessary because all theme and plugin logic, and data storage in WordPress are implemented using these two technologies.
In WordPress, PHP executes all application logic and MySQL stores all site data, including posts, users, settings, and metadata.
PHP
PHP is the server-side scripting language that is used to run your website functionality on the server and handles all the logic.
It also helps in the communication and management of Databases.
PHP is the core of WordPress. All server-side features in WordPress, such as authentication, content processing, plugin execution, REST API endpoints, and theme rendering, are developed and implemented in PHP.
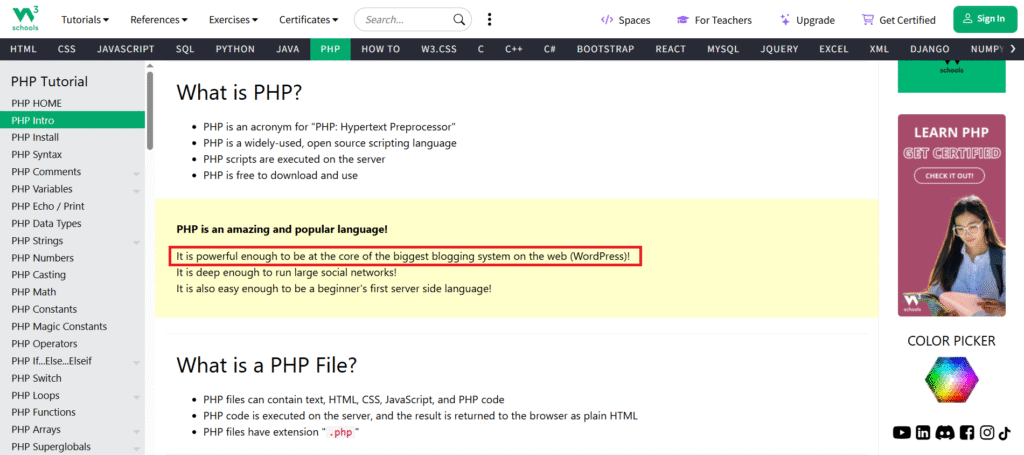
W3Schools highlights the role of PHP in WordPress
MySQL
When you develop any website, you definitely need a database to store the data of posts, pages, users, comments, settings, and metadata that are loaded every time a page is generated.
So, for this, you need MySQL, which is a relational database management system (RDBMS).
It is used to handle all the operations related to the database. PHP can connect with it and send instructions in the form of SQL queries to perform all the database operations.
Similarly, in WordPress, PHP sends SQL queries to the MySQL database through the $wpdb interface to retrieve content, store user input, update settings, and manage data.
Practice Project for You:
Build a small PHP and MySQL user login system that creates users, validates credentials, stores hashed passwords, and retrieves user records from the database. This directly prepares you for understanding how WordPress manages users and authentication internally.
Step #3: Explore Object-Oriented Programming (OOP)
OOP is a programming methodology that allows you to organize your code into objects and classes to create modular, reusable, scalable, and maintainable code.
This coding methodology makes you follow the famous coding principle DRY (Don’t Repeat Yourself), which ultimately helps you in making your code short, organized, and reusable.
In WordPress development, object-oriented programming is mainly used to organize plugin and theme code into classes so that features can be used, maintained, and extended where they are desired without editing the same logic in multiple files.
Large WordPress plugins such as Elementor and WooCommerce organize most of their backend logic using OOP, which can be verified directly in their public codebases.
Here is an example code of Elementor, which highlights the use of OOP
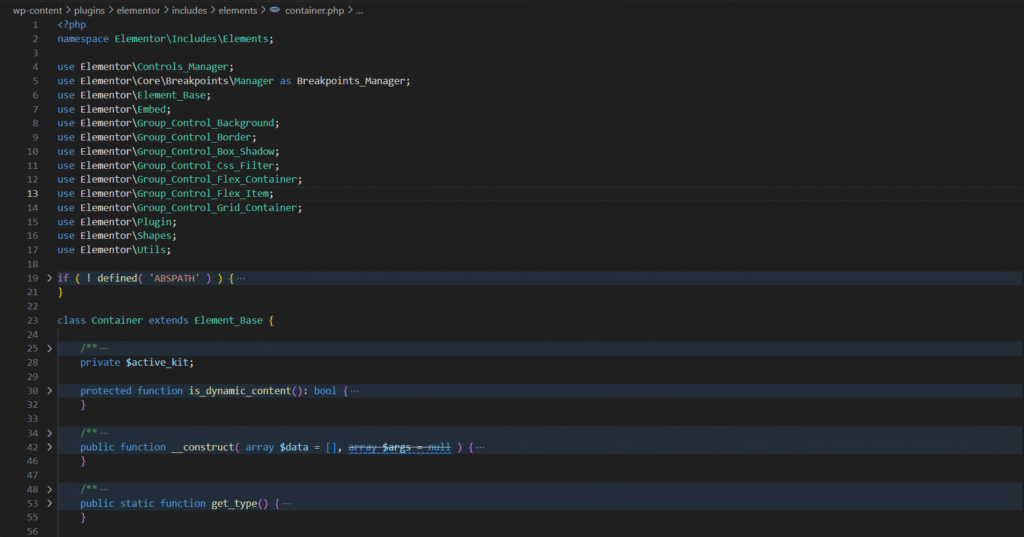
Every time you add a container in your website design using Elementor, this class is used in the backend.
Think about it, if OOP methodology is not followed and you want to use the container 100 times in your website, then you have to duplicate this code 100 times.
But OOP allows a single class to define that feature (behavior) and be reused through multiple places (instances), while each instance only stores its own configuration data.
You can explore more about OOPs in PHP here
Step #4: Learn Git & GitHub
In foundation skills, you will then learn Git & GitHub, which are your code “time machine.”
Git is a version control system that records changes to your source code over time, while GitHub is a hosting platform used to store Git repositories and collaborate with other developers.
In real projects, developers use Git commits and branches which helps you track changes, roll back mistakes, and collaborate with others during the development of your project.
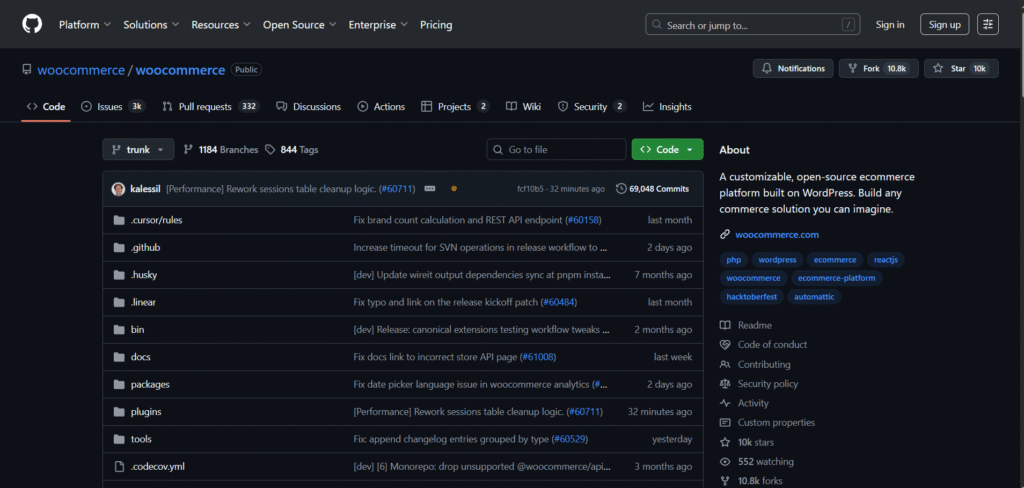
This WooCommerce GitHub repository depicts the changes in code by various team members, and you can also see the description of changes in the files. You also get options to roll back and test the previous version.
Pro Tip: Uploading your practice projects to GitHub allows employers and clients to review your commit history, project structure, coding methodology, and problem-solving approach, which is often used as an informal technical signal during developer hiring.
WordPress Fundamentals: Getting Comfortable with the Ecosystem
Now that you have already got your coding basics down, it’s time to step into the WordPress world.
Think of this stage as learning the rules of the game before you start rewriting them.
The goal is not to rush into theme or plugin development yet, but it is simply to get comfortable with the WordPress ecosystem first.
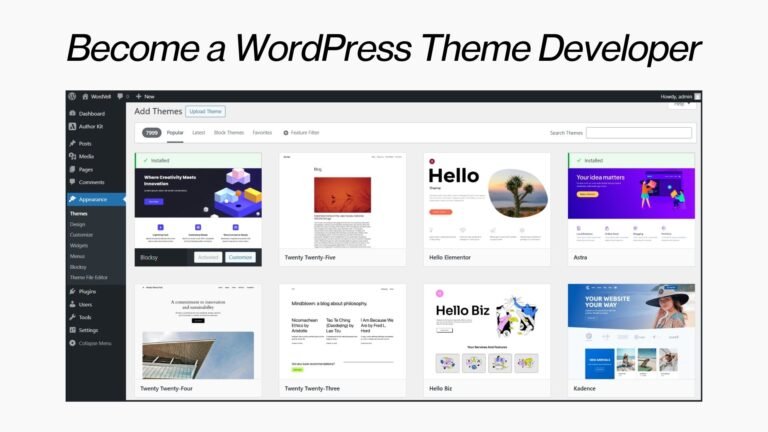
Step #5: Get Natural with WordPress Designing
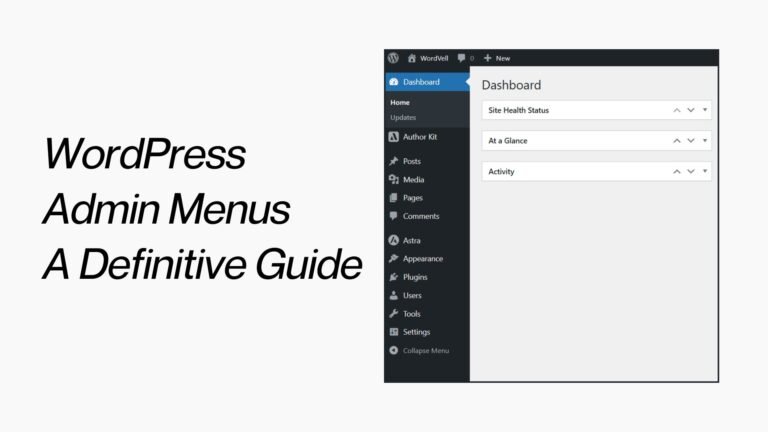
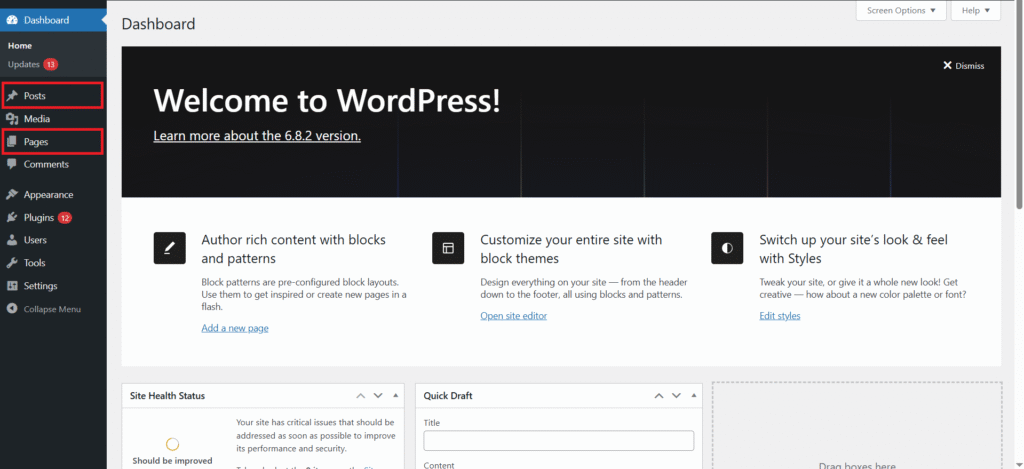
At this stage, it’s time for you to get comfortable with WordPress design through the Admin Dashboard.
The Admin Dashboard is where you manage site structure, navigation, layouts, content, themes, and plugin-based features for a WordPress site.
Focus on learning how to design a WordPress site through the Admin Dashboard. Specifically explore the Page editors, Site Editor or Customizer (depending on the theme), Menus, and widget or block layout areas.
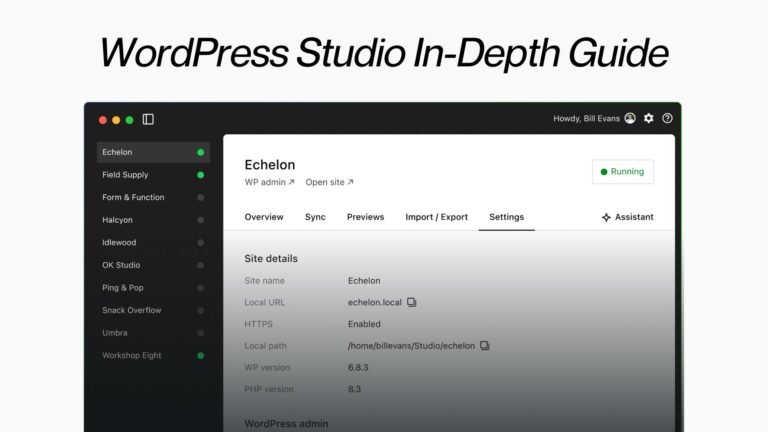
Start by installing WordPress in a local development environment using LocalWP or XAMPP so you can test themes, plugins, and layout changes without risking a live website.
For beginners, LocalWP usually requires fewer configuration steps than XAMPP because it handles PHP, MySQL, and server setup automatically.
Follow this video to install WordPress with LocalWP
If you want to use XAMPP to install WordPress locally, then follow this video:
Now, start experimenting with WordPress with these basic tasks:
- Install two different block or classic themes and try one by one, and observe how headers, footers, typography, and layout templates change between them.
- Create four pages (Home, Blog, About, Contact) and configure one of them as the site’s static homepage from the Reading settings.
- Create a primary navigation menu and assign it to the theme’s main menu location.
- Publish at least three blog posts and verify how they appear on the blog or archive page.
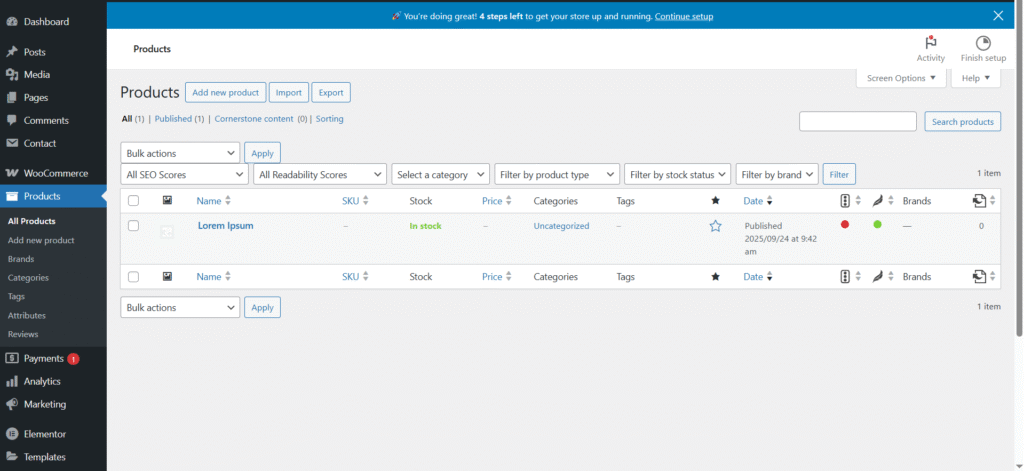
- Install WooCommerce and activate its setup wizard to understand how plugins introduce new pages, menus, and database-driven features.
- Install Elementor and compare how page layouts differ between the default editor and a page-builder interface.
- Modify widget or block-based layout areas and observe how sidebars or footer areas are generated by the theme.
After completing these exercises, your site becomes a working site that contains a configured homepage, a working navigation menu, a blog listing page, and at least one plugin-powered feature such as a shop page or custom layout.
Many people already know this part, which is often what inspires them to explore development further.
If you already know how to configure themes, menus, pages, and plugins inside the Admin Dashboard, you can move directly to the development-focused steps.
But if it’s your first time, there are some resources for you to learn:
- Follow the Official WordPress Design Course.
- Explore a YouTube Tutorial by Darrel Wilson
Repeat the same setup process at least once on a fresh installation: choose a theme, create pages, assign menus, configure a homepage, and install one plugin to add new functionality.
This repetition helps you get used to WordPress configuration.
The goal of this step is to reliably configure a complete site layout with confidence, even without external help or tutorials.
Once you can shape a complete website design on your own, you’ll have the foundation to move into the deeper development side of WordPress.
Step #6: Understand WordPress Core Structure
Once you are familiar with WordPress design, the next step is for you to understand the WordPress blueprint, which means understanding the WordPress core structure.
This knowledge is needed for you to understand where WordPress code is actually organized so you can safely extend and customize it without modifying core files.
A standard WordPress installation is organized into three top-level directories, and each one has a very different purpose in the runtime and customization workflow.
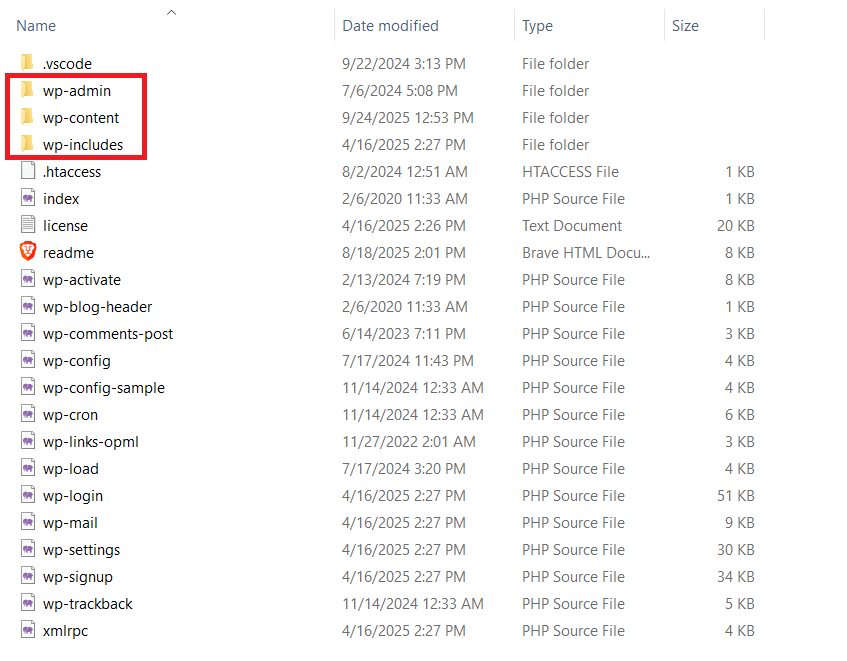
wp-admin contains the PHP files that generate the WordPress administration interface, such as the dashboard screens, settings pages, and management tools.
Developers normally do not modify files in this directory directly because changes are overwritten during WordPress updates.
wp-includes contains WordPress core libraries such as the hook system, database abstraction, user and post APIs, formatting functions, and REST API infrastructure.
This directory holds the internal engine that themes and plugins depend on.
wp-content is where all site-specific work is stored, including installed themes, custom and third-party plugins, and uploaded media.
This is the only directory where custom development is expected to live.
Knowing exactly which directory contains core logic, admin logic, and site-specific code prevents common beginner mistakes such as editing core files, searching in the wrong folders during debugging, or placing custom code where WordPress will later overwrite it.
Step #7: Discover the Magic of Hooks (Actions & Filters)
Now it’s time to meet WordPress Hooks, the real magic behind every theme and plugin.
Hooks are the primary extension mechanism that WordPress uses to let themes and plugins run custom code during core WordPress execution.
It is a named execution point in WordPress where external code can be attached and executed without modifying core files.
Hooks let you add new functionality or modify existing behavior in WordPress without ever touching the core files.
That means you can customize WordPress safely without editing its core and breaking things.
There are two types of hooks you’ll use all the time:
- Action Hooks allow you to run custom logic at a specific point in the WordPress lifecycle, such as when WordPress initializes, when a post is saved, or when scripts are enqueued.
- Filter Hooks allow you to receive a value and modify that value before it is displayed as output by WordPress, and then return the modified result back into the execution flow. (like edit the Post titles before it’s displayed).
For example, WooCommerce registers multiple actions and filters to inject checkout fields, modify cart calculations, and customize product display without editing WordPress core files.
Without understanding hooks, you cannot reliably extend or modify core workflows such as content rendering, authentication, REST responses, or plugin integrations.
Here’s the truth: every plugin or theme you’ve ever used is powered by hooks.
So, the sooner you master them, the sooner you’ll become a WordPress developer.
To study hooks effectively, focus on learning how callbacks are registered with add_action() and add_filter(), how priority affects execution order, and how arguments are passed to hook callbacks.
For this, you can
- Dive into the WordPress Plugin Handbook or
- Check out WordVell’s detailed guide on WordPress hooks
Once you get them, you can alter WordPress behavior in the way you desire.
Becoming a Theme Developer
So far, you have learned WordPress design, directory structure, and hooks.
Now, the next step is to control how the front-end of a site is rendered through a custom theme.
Now it’s time to bring your creativity and code together by stepping into theme development.
Theme development focuses on defining page structure, layout, and site design by using WordPress template files and block-based templates.
Step #8: Create Custom Blocks with Gutenberg Block Editor
Before you step into full-fledged theme development, the first tool you should master is the Gutenberg Block Editor because modern themes are expected to support block-based layouts and styling.
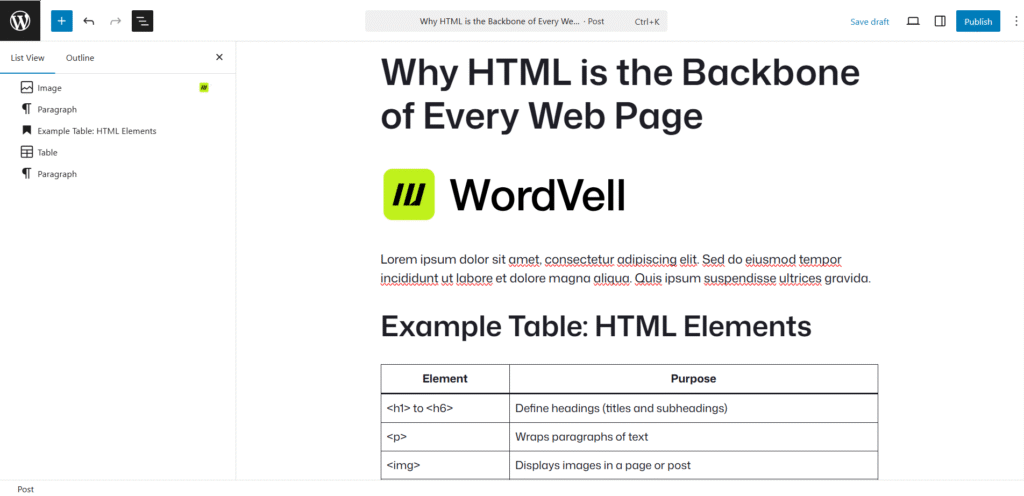
In WordPress, post and page content is composed of structured blocks such as Text, images, buttons, galleries, and forms that are saved in the database and rendered when the page is loaded.
You will need various blocks to create and format a post. Here, we add an image, a table, a heading, and a text block inthe Gutenberg editor to create a post.
As a developer, you will eventually need to create custom blocks that can be reused or even sold.
Custom blocks are created using the WordPress block registration system and can include dynamic rendering in PHP, which allows you to build reusable components such as sliders or pricing tables.
Even themes and plugins have their own Gutenberg blocks so users can use their functionality in their posts and pages.
For example, the wpDataTables plugin has Gutenberg blocks to add tables and interactive charts in posts and pages.
The same block-based concepts are also used when extending popular page builders such as Elementor, Divi, and WPBakery, where addons are implemented through their widget or module APIs.
Step #9: Learn to Develop Custom Themes
A functional theme is built by implementing the required files, such as style.css and functions.php, and templates such as index.php, single.php, page.php, and block templates, which together define how WordPress renders every page type.
But the next question is, how should you proceed?
Here’s how:
You should begin by creating a child theme (which is an extension of the existing parent theme).
Modify its styles, override templates, change colors, edit layouts, and add small features so that you can safely experiment without changing the parent theme’s files.
Learn more about Creating and Customizing a Child theme here.
Once you are confident, build a simple custom blog theme from scratch that includes a homepage template, a single post template, and a page template, and connect them through the WordPress template hierarchy.
Extend the theme by registering widget areas, defining custom headers, and adding block styles through theme.json and block style registration.
Follow the WordPress Theme Handbook to Learn Theme Development Step-by-Step
Step #10: Sharpen Your Responsive Design Skills for Mobile-Friendly Sites
Mobile responsiveness is one of the factors that Google evaluates when ranking pages, and WordPress themes that fail the official mobile-friendly test can receive lower visibility in search results.
Here is the proof:
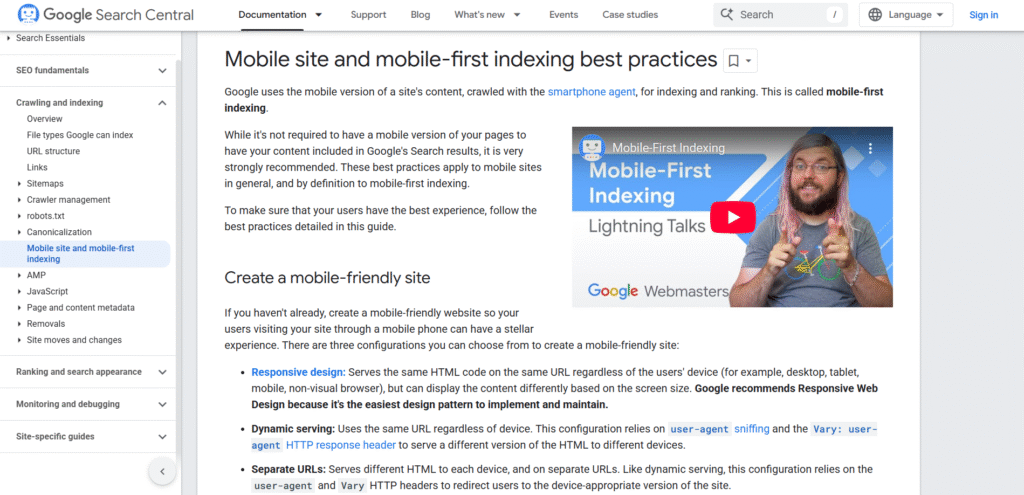
Google literally ranks you lower if your site isn’t responsive. And with over 60% of web traffic coming from mobile, you can’t afford to ignore it. (Source: Innoraft)
That’s why responsive design is one of the non-negotiable skills every WordPress developer must master.
In WordPress, responsive design means ensuring that your templates adapt cleanly across various devices so content, menus, and interactive elements remain usable on narrow screens.
To implement responsive templates efficiently, many developers use utility-first frameworks like Tailwind CSS or component-based frameworks like Bootstrap, which provide pre-defined responsive grid systems.
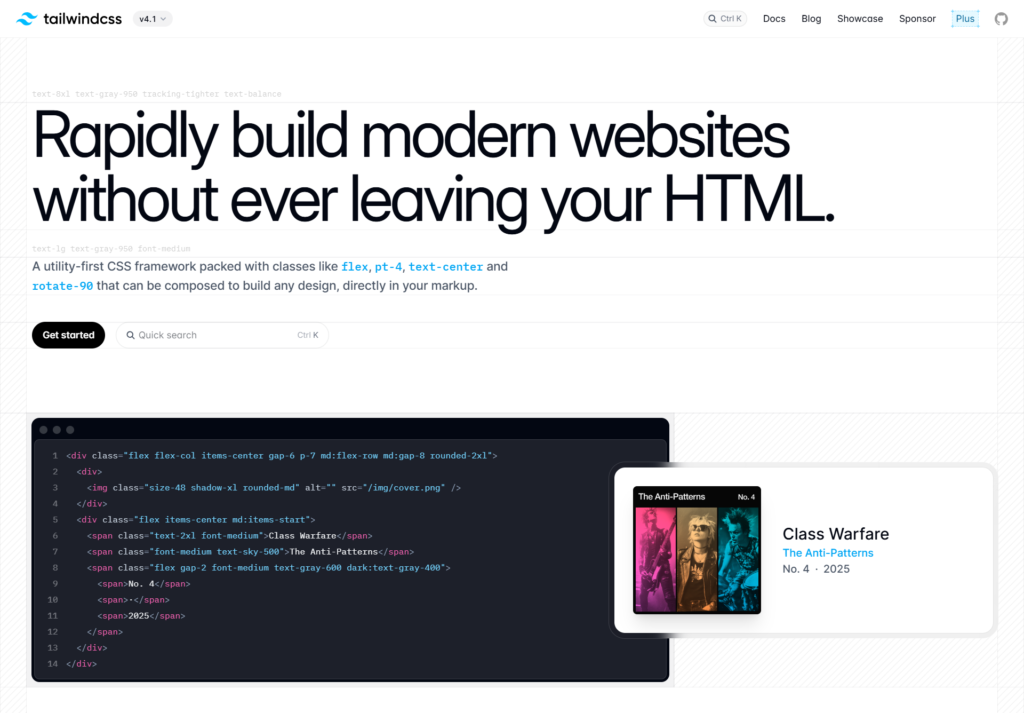
For example, in Tailwind CSS, you can add classes such as sm:grid-cols-1 and md:grid-cols-2 apply different grid layouts at defined breakpoints, while Bootstrap col-md-6 assigns column widths based on device sizes.
Use modern Frameworks like Tailwind CSS and Bootstrap, which let you design responsive pages swiftly and also reduce the amount of custom code you write, but developers should also measure performance trade-offs, as large CSS bundles can increase page load times.
In practice, Tailwind CSS has been adopted by many modern themes due to its small runtime footprint and fine-grained control, while Bootstrap remains common in theme prototypes and plugin UI tooling.
If you choose to write your own responsive CSS, tools like browser DevTools and mobile emulation can help you verify breakpoints, element sizing, and touch target sizes across devices.
But why waste hours developing and testing when battle-tested frameworks already exist? Smart developers save time, not waste it.
So, don’t try to reinvent the wheel.
Instead, we advise you to use already developed advanced frameworks like Tailwind CSS or Bootstrap, which make your sites look modern and responsive.
Practice Project:
Update your custom theme’s templates so menus, images, and text blocks adapt across phone, tablet, and desktop viewports, and verify responsiveness using Chrome DevTools and the official Google Mobile-Friendly Test.
Step #11: Explore the WordPress REST API for Dynamic Content
The WordPress REST API allows your site’s data to be fetched through HTTP endpoints such as /wp-json/wp/v2/posts, /wp-json/wp/v2/pages, and /wp-json/wp/v2/media, allowing external clients and JavaScript applications to read and modify WordPress content using standard REST requests.
Using authenticated requests, you can retrieve posts, create new content, update existing posts, upload media, and manage taxonomies directly through REST endpoints
For example, a WordPress site can consume a third-party sports data API, store the response as custom post types, and expose that dynamic data through custom REST routes for front-end rendering.
WordPress is commonly used as a headless CMS for mobile applications, where the app is responsible for display by consuming REST endpoints for posts, categories, authors, and media, while WordPress remains responsible only for content management.
In a React or Vue-based frontend, the application typically fetches content from WordPress REST endpoints and renders pages entirely on the client, using WordPress only as a structured data source.
In real client projects, REST APIs are mainly required when building headless websites, mobile applications, dashboards, or when multiple frontends must share the same WordPress content repository.
You can learn WordPress REST APIs through the WordPress APIs handbook
Becoming a Plugin Developer
Theme development in WordPress focuses on making WordPress appearance and layout look attractive.
Plugin development focuses on adding new functionalities and features to WordPress.
As a plugin developer, you work with WordPress hooks, database APIs, REST endpoints, background tasks, and the admin UI to add new behavior instead of modifying theme files.
Instead of just designing, you’ll start coding features that transform WordPress into whatever shape you (or your clients) need.
Step #12: Learn to Develop Custom Plugins
Most production features in WordPress are developed through plugins like e-commerce, contact forms, SEO optimizers, and security tools, is powered by plugins.
To start learning plugin development, use the official WordPress Plugin Handbook sections to learn the plugin structure, headers, hooks, settings API, security, and REST API development as your primary reference.
If you are more comfortable with learning through video lectures, you can follow the official WordPress development course that covers everything from basics to advanced concepts.
Besides learning the plugin concepts, also apply your learning with practice projects.
- Start with a minimal plugin that registers a custom admin notice and attaches it to the
admin_noticeshook to understand the plugin lifecycle and execution flow. - Next, build a plugin that adds a settings page using the Settings API and stores options in the WordPress options table.
- After that, create a plugin that registers a custom REST endpoint and consumes an external API, then exposes the processed data to WordPress pages or blocks.
With consistent learning and practice, you’ll soon be building solutions that are used by a vast community of WordPress users.
Step #13: Master Custom Post Types (CPTs), Taxonomies & Fields
By default, WordPress stores content mainly as posts and pages, which is sufficient for blogs and simple sites.
But becomes limiting when a project needs structured data such as
- A library of Books
- A catalog of Properties
- Or a portal of Courses?
That’s where Custom Post Types and Taxonomies come in.
Custom Post Types allow you to define new content models, while taxonomies allow you to classify those models using controlled vocabularies such as genres, locations, or categories.
A Custom Post Type is registered through the WordPress API and behaves like native content in the admin area, queries, REST API, and permissions system.
Taxonomies are attached to a post type and provide structured relationships that can be queried efficiently, such as filtering books by genre or properties by location.
Custom fields store additional attributes for each item using the post-meta system, such as price, ISBN, duration, or rating, which can be retrieved through the metadata API and exposed to templates or APIs.
For example, WooCommerce registers a Product custom post type and related taxonomies and attaches structured product data such as price, stock status, and SKU through metadata.
Custom Post Types, taxonomies, and fields allow WordPress to represent domain-specific data models instead of forcing every entity into generic posts.
Step #14: Understand Roles & Capabilities
Imagine running a multi-author magazine, a student portal, or an eCommerce marketplace.
So, you don’t want everyone to have the same powers as you have in WordPress, right?
That’s why in multi-user WordPress systems, access control is implemented through roles and capabilities rather than through page-level restrictions.
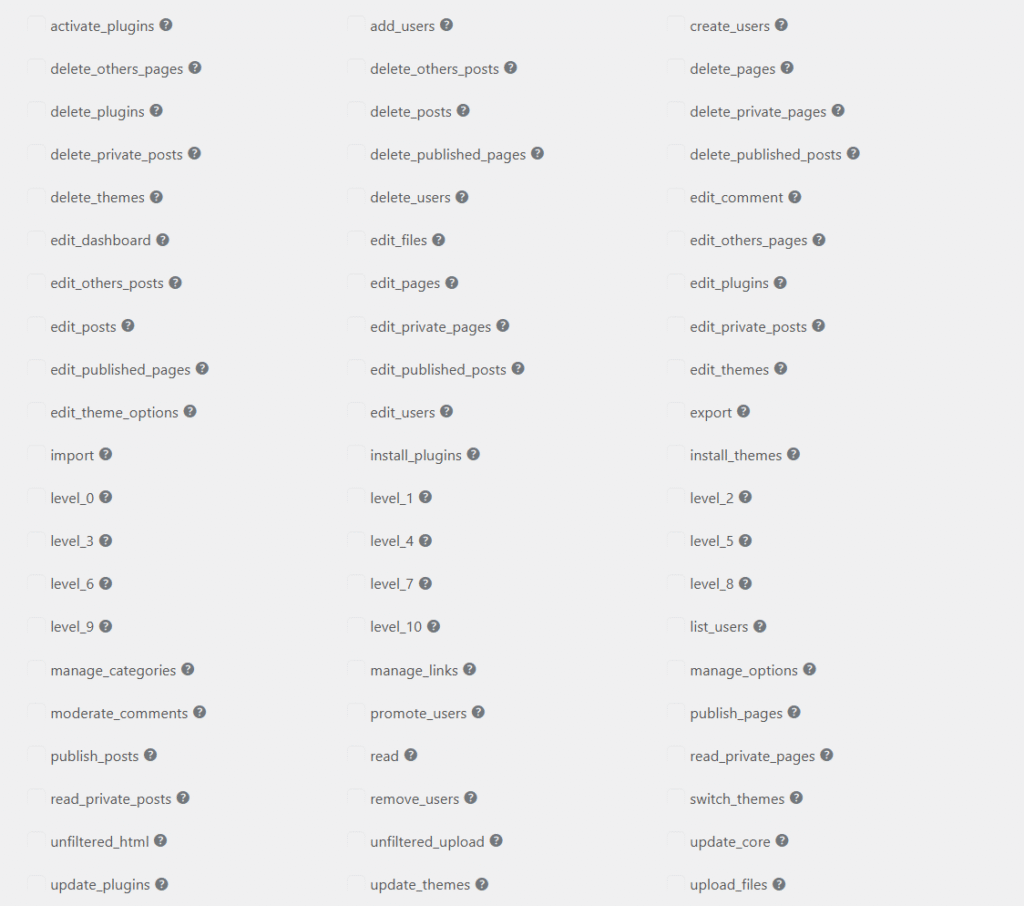
A role is a collection of capabilities, and a capability represents a single permission, such as editing posts, publishing content, or managing settings.
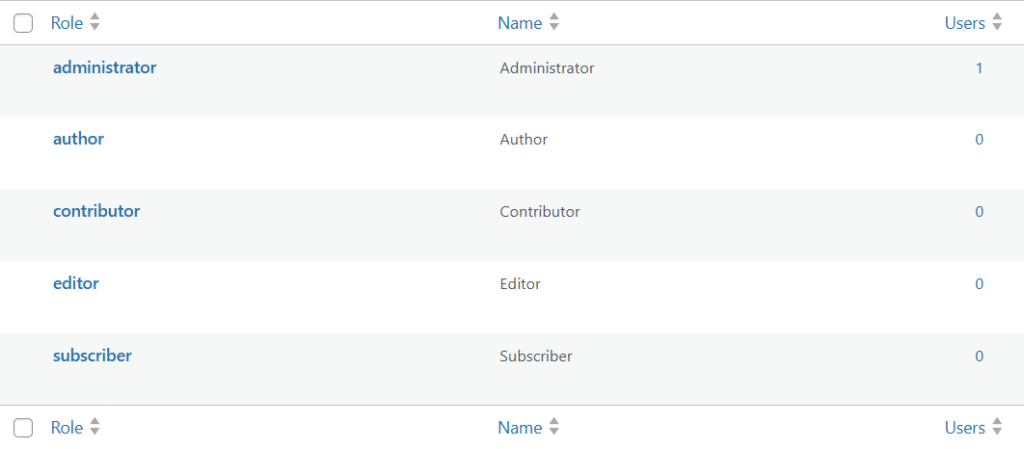
Here are some roles and capabilities WordPress offers by default to manage users:
Now, your job as a developer?
- Learn how to customize and manage permissions by adding or removing capabilities from existing roles.
- Create new custom roles like Vendors, Reviewers, and Students, and assign only the capabilities required for their workflow.
- Develop custom permissions for custom roles.
The Plugin Handbook sections on roles, capabilities, and users can help you understand and implement these concepts in your themes and plugins.
⚠️ Warning: A single misstep here can open security risks. But when done right, roles & capabilities let WordPress scale to entire teams, schools, or businesses.
Step #15: Develop Custom REST API Endpoints
Earlier, you saw how the REST API lets you fetch WordPress data. But here’s the next level:
After using the built-in REST endpoints, the next step is to create your own endpoints to expose custom data and workflows that are not available in WordPress core.
Custom REST endpoints are registered through the WordPress REST API and allow you to define your own routes, request parameters, permission checks, and response structures.
That means WordPress can act as the backend for:
- React or Vue apps
- Mobile applications
- Even SaaS platforms
For example, in a booking system, you would expose endpoints for available time slots, reservations, and cancellations, while storing bookings as a custom post type and validating each request with a permission callback.
This approach is commonly used in large-scale projects that separate the user interface from the content and business logic, but it introduces additional responsibilities such as API versioning, authentication, and server-side performance tuning.
Advanced Skills for Full-Stack Mastery:
Becoming a full-stack WordPress developer means mastering not only themes and plugins but also backend processes like database design, performance optimization, and secure coding.
Enterprise-level sites require scalable architecture: efficient queries, proper caching, security layers, and fault-tolerant design to handle high traffic and complex user workflows.
The skills given below are highly necessary for the professional level.
Step #16: Database Optimization for Scaling Big Projects
WordPress runs on MySQL, which means your queries can make or break performance.
Inefficient queries lead to slow dashboards, delay page rendering, increase server load, and frustrated users.
For example, a WooCommerce store with 10,000+ products may experience minute-long load times if meta_query queries aren’t indexed or optimized.
Instead, learn to write optimized queries using WP_Query with proper parameters, caching, and database indexes to reduce load times.
For instance, replacing nested loops with pre-fetched query arrays can drop page load from 7 seconds to under 1 second on high-volume stores.
As WP Engine notes: “Database optimization is not a luxury. But, it’s a survival skill for high-traffic WordPress sites.”
Step #17: Security Best Practices for Trusted Products:
Security is an aspect that is non-negotiable in this digital world. And the same goes for WordPress.
Wordfence Data shows that WordPress sites face around 90,000 attacks per minute. Risks include SQL injection, XSS, and privilege escalation if themes and plugins are not properly coded.
Being the world’s most popular CMS also makes it the biggest target.
That’s why you need to master:
- Sanitization & escaping (prevent malicious input).
- Nonces (protect forms and actions).
- Principle of least privilege (tight role management).
If your themes and plugins are insecure, no one will trust them, including clients, agencies, or marketplaces.
Secure coding practices drive professional credibility, prevent breaches, and maintain client and marketplace trust, as documented in WordPress security guidelines.
Step #18: Performance Optimization to Enhance SEO & User Experience
No one likes a slow site. Not users. Not Google.
Google’s Core Web Vitals indicate that slow performance causes rankings degradation, and research also shows that a 1-second delay in load time can drop conversions by 7%.
In WordPress projects, performance work usually focuses on three concrete bottlenecks:
- Repeated database queries during PHP execution
- Large uncompressed media files
- Slow global delivery of static assets.
Page caching and object caching reduce repeated PHP execution and database reads, image optimization reduces transferred bytes per page, and a CDN shortens delivery time for static assets for users located far from the origin server.
Developers who can measure and improve server response time and other factors are typically responsible for site-wide performance budgets, hosting configuration, and caching strategy instead of only theme or plugin features.
Step #19: Testing & Debugging to Ship Bug-Free Code
Every developer faces bugs. Great developers catch them before clients do.
Examples include checkout failures caused by JavaScript errors, broken admin screens due to PHP fatals after updates, and data corruption caused by incorrect database queries.
A bug in a commercial-level product can cause serious consequences, like hurting user trust or a security breach.
To prevent it, test your code deeply in staging environments and even after every deployment.
If you get a bug, WordPress gives you tools for debugging, like:
- WP_DEBUG for error reporting.
- Query Monitor to check slow queries.
- Debug Bar for performance tracking.
These checks are performed before releases because debugging tools are disabled in production to avoid performance overhead and information disclosure.
Step #20: Headless WordPress for the Future
The future of WordPress is headless.
In a headless WordPress architecture, WordPress is used only for content management and content APIs, while the front-end is built separately using JavaScript frameworks like React, Next.js, or Vue that will display data by fetching through the REST API.
As Matt Mullenweg (WordPress co-founder) said: “Headless WordPress is not just an experiment, but it’s the future of the platform.”
Why does this matter?
- You get blazing-fast UIs.
- You can build WordPress-powered mobile apps.
- You future-proof your skills for enterprise-level projects.
Even WordPress’s own team invests heavily in the REST API and Gutenberg to support this shift.
Setting Up a Development Environment Like a Professional Developer:
Besides, you know how to code, there are some prerequisites and tools that help you to get started and work like a professional developer.
Think of it like a chef’s kitchen: the right tools make the cooking faster, safer, and a lot more enjoyable.
Here’s what you need to set up your own WordPress dev environment:
1. Local Development Setup
Never experiment on a live client site because that will result in broken sites.
Instead, build and test on a local environment first.
A local environment runs WordPress with its own PHP runtime, MySQL database, and web server on your machine, allowing you to reproduce production behavior without affecting live users.
Tools like Local WP, XAMPP, or Docker let you create a safe local environment on your computer where you can:
- Test new themes and plugins
- Debug without consequences
- Break things (and fix them) without risk
This way, by the time your code hits a live server, it’s already polished.
Pro Tip: Start with LocalWP for its simplicity, later move on to XAMPP and Docker at advanced levels
Here’s a video guide to install and set up WordPress using LocalWP
2. Collaboration Tools:
If you are developing as a team, then these tools will help you in many regards, like
- GitHub for version control
- Trello/Jira for task tracking
- Slack/Discord for communication.
Even if you work solo, practicing these tools builds habits that will make teamwork easy for you at a later stage.
3. CI/CD Pipelines
Manual deployments are outdated and risky.
Imagine pushing code updates that instantly break a client’s site.
It will be embarrassing, right?
That’s why professionals rely on CI/CD pipelines with tools like GitHub Actions or GitLab CI. Because:
- Your updates are automatically tested
- Bugs are caught before deployment
- New code gets shipped smoothly, every time
It results in Less stress, fewer errors, and more time for creativity.
Business & Career Growth Opportunities with WordPress
Technical skills alone rarely guarantee success.
The world is full of smart developers who never succeed simply because no one knows them.
If you want WordPress to pay your bills or even build you a successful business, then you need more than code.
You need visibility, authority, and a strategy that puts you in front of the right people.
Let’s break down how you can turn your skills into real opportunities.
1. Build a Portfolio: Your Digital Office
Imagine applying for a job without a CV. That’s what it feels like to pitch clients without a portfolio.
Your portfolio isn’t just a website, but it’s your digital office.
It’s where people “walk in,” see your work, and decide whether you’re trustworthy.
Even if you don’t have client projects yet, you can:
- Showcase practice projects (e.g., “Custom Plugins and Themes”)
- Share before-and-after examples to highlight impact
- Write short case studies explaining your process
This instantly separates you from faceless developers. People trust results they can see.
2. Contribute to WordPress.org: From Developer to Authority
When you publish a free plugin or theme on WordPress.org, you’re not just “helping the community.”
You’re putting your name in front of thousands of active users.
This has two direct benefits:
- Authority: When others already know your work, they trust you faster and are willing to pay more.
- Leverage: Free products often act as lead magnets. They bring users who later hire you or buy your premium add-ons.
Think of it as free marketing strategy that also builds your credibility.
3. Freelancing: Your Gateway to Freedom
Freelancing helps you earning money online and gaining global exposure.
But clients don’t get attracted to a generic “WordPress developer.” Instead, postion yourself as a niche problem solver in a wordpress category. For example:
- WooCommerce performance optimization
- Custom plugin development
- Membership site setups
Positioning yourself around one or two recurring problem types allows you to reuse solutions, estimate work more accurately, and justify higher project pricing based on reduced delivery risk.
Start small, over-deliver, collect testimonials, and you’ll notice clients chasing you instead of the other way around.
4. Agency or SaaS: Scaling Beyond Yourself
At some point, freelancing caps your income due to limited delivery capacity and availability.
The way to scale is either by:
- Building a small agency and offering full-stack services, or
- Creating SaaS products/premium plugins that generate recurring income.
This shift moves you from “trading hours for money” to building assets that pay you continuously.
This way you might get real freedom.
5. Continuous Learning + Networking: The Multiplier
Technology evolves. Skills get outdated. The developers who thrive are the ones who never stop learning and who surround themselves with the right people.
And Most WordPress contracts originate inside developer communities, agency networks, and contributor groups rather than public job boards.
That’s why, you should:
- Attend WordPress meetups, online groups, and conferences
- Follow industry leaders and learn from their insights
- Keep upgrading your skills with modern stacks (React, headless WordPress, AI integrations)
Many of the biggest opportunities come from conversations, not job boards. Networking multiplies your visibility.
Common Mistakes to Avoid
Becoming a full-stack WordPress developer is exciting, but many learners slow down their growth by repeating common mistakes.
The good news is that if you know what they are and avoid them early, you will save yourself years of struggle.
Here are some of them:
1. Skipping PHP And MySQL Fundamentals
The most common mistake beginners make is skipping PHP and MySQL fundamentals.
WordPress runs on them, and without understanding queries, loops, and how data is stored, you will always be stuck moving forward and scaling.
You should master these basics once, and you will see everything else in WordPress becomes easier.
2. Ignoring Security and Performance
Many beginners also ignore security and performance, which is an alarming situation.
A beautiful site means nothing if it’s slow or hackable.
You must learn to secure your code, optimize queries, and apply caching. These small habits separate pros from amateurs.
3. Remaining In Isolation
And finally, too many developers remain isolated. If no one sees what you can do, opportunities will pass you by.
Showcase your skills by publishing a small plugin, sharing a case study, or contributing to WordPress.org. Visibility creates trust, and trust brings clients, jobs, and collaborations.
Pro tip: Don’t be afraid of mistakes. Think of them as checkpoints. If you have already made some, recognize them, fix them, and move forward.
By doing this, you will already be ahead of most learners on the same journey.
Conclusion + Next Steps:
This roadmap to become a full-stack WordPress developer is not just to make you expert in writing code to develop plugins and themes.
But it is crafted to help you build a career that gives you freedom, impact, and potentially a handsome income.
By following this roadmap step by step, you now have a clear path to grow from a beginner customization with themes and plugins into a professional who can build complete WordPress solutions, launch products, or even scale into an agency.
Remember, skills alone do not create opportunities, but positioning and persistence do.
Keep practicing, keep sharing your work, and keep connecting with the WordPress community and target audience.
If you ever feel stuck or unsure about your next step, don’t hesitate to connect with us. Drop a comment, send a question, or contact us directly.
We are here to guide you along the way.
Before signing off, Subscribe to our newsletter for more WordPress guides.