Discover the
Modern
WordPress with WordVell

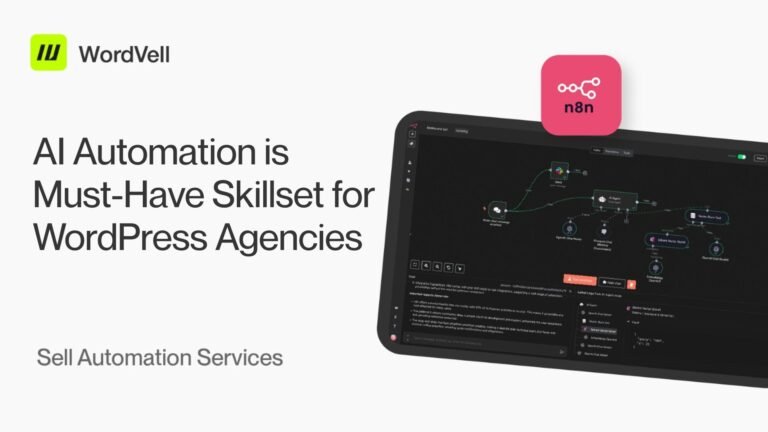
How to Connect Claude AI with WordPress using n8n MCP Server? (The 12-Step Blueprint for Next-Level Automation)
If you’ve ever spent hours updating posts, WooCommerce products, managing users, admin tasks, or handling WordPress settings, you know how draining manual work can be.
Every click steals time.
Every small task breaks your focus.
But by connecting Claude AI with WordPress using n8n MCP, you can automate real site actions through simple natural-language commands.
Now imagine telling Claude AI:
“Write and publish a post.”
And it gives you a reply: “It’s Done.”

That’s exactly why Model Context Protocol (MCP) feels like a breakthrough, as you saw in the example above.
In this 12-step guide, you’ll learn how to set up the n8n MCP Server and connect Claude to your WordPress site using it to build automation workflows for content, SEO, and admin tasks.
If you want to save time, reduce manual work, and run your WordPress site more efficiently, this blueprint shows you how.
Let’s understand the breakdown of MCP first…
What Is Model Context Protocol (MCP)?

So, what exactly is Model Context Protocol (MCP)?
In simple terms, it’s a bridge that lets AI tools talk to your apps without tangled API integration.
Think of MCP as a universal translator between Claude and WordPress that finally lets them understand each other without custom code.
Anthropic built MCP after hearing the same complaint from developers for years: “AI is powerful, but connecting it to real tools is a nightmare.”
One engineer described it as “giving Claude hands.” Suddenly, AI wasn’t just generating text only; now it could operate software.
That mindset changed everything.
If you want the deeper breakdown, then read our full guide on What is MCP.

Why does MCP matter for WordPress users?
You probably have experience that the old workflow was slow. You wrote posts manually. You clicked through plugin settings.
It was time-consuming.
The new workflow? You say: “Claude, create a draft post about the best hosting providers.” And it’s done.
This unlocks real power for everyday workflows:
- Bulk-update WooCommerce product prices
- Auto-generate blog posts from scratch with research
- Manage user roles with simple conversational commands
Content teams adopting AI automation report 35–50% faster turnaround, according to multiple industry surveys. And WordPress is now firmly part of that shift.
Why choose n8n? The Missing Piece Between Claude and WordPress
n8n has the built-in MCP server that actually runs your WordPress automations. It gives Claude the power to convert any AI command into real WordPress actions.
Another major thing is that it offers a visual dashboard to integrate your WordPress with the MCP Server, which makes the work a lot easier.
n8n is the only tool that went all-in on MCP early, building native support so Claude can send structured commands straight into your WordPress site through its MCP.
Now let’s make this real with some examples.
- An e-commerce store owner updates 500 product prices in minutes. Claude crafts the request, n8n MCP pushes it to WooCommerce in bulk.
- A content agency auto-publishes client drafts after a final AI review with no dashboard login needed.
- A membership site lets Claude manage user access on demand: “Add John to the premium plan,” and n8n MCP executes instantly.
One developer told us their first MCP workflow “felt like hiring a virtual assistant who never sleeps.” And that’s the magic of n8n and Claude, which makes this automation feel human.
What are the prerequisites for connecting Claude AI to WordPress using n8n MCP?
Before we dive in, let’s make sure you have everything ready.
Trust me, skipping this part is how you end up halfway through a setup, googling missing tools, and wondering why nothing works. We’ve all been there.
Here’s your quick checklist:
- A WordPress site (self-hosted or a premium plan with admin dashboard access)
- Claude AI Desktop app for Windows or Mac. The browser version won’t support MCP
- Node.js installed
- An n8n account
- Five uninterrupted minutes
Pro Tip: Not sure if Node.js is installed? Open Terminal or Command Prompt and type:node –version
If you see a number, you’re good. If you don’t, now’s the time to install it.
Step-by-Step Guide: Connect Claude AI with WordPress using n8n MCP
This is where it gets fun.
We’ll build your automation in 12 steps. Each step has a clear goal, and you’ll know instantly if something’s off.
Follow this closely, and you’ll have Claude controlling WordPress like a personal assistant.
Step 1: Create Your n8n Account
Head to n8n.io and sign up with your email.

This will open the n8n Cloud Dashboard.

You can also choose a self-hosting n8n setup. But we will cover self-hosting n8n in a separate guide.
Click “Start from scratch.” Templates are great, but for MCP, you want a clean slate.
Step 2: Add the MCP Server Trigger
You’re now staring at a blank canvas.

- Click “Add first step.”
- Search “MCP Server” → select MCP Server Trigger.

- The settings panel opens. Keep defaults as they are, and click “Back to Canvas.”

This node acts as the “listener.” It waits for Claude to send MCP commands into your workflow.
Pro Tip: In the settings panel, you’ll see a webhook-style URL. That’s your unique MCP connection string. We’ll copy it later.
Step 3: Connect WordPress to Your Workflow
Now let’s teach n8n how to talk to WordPress.
- Click the + button next to the MCP node.
- Search “WordPress.”

- Select WordPress. The WordPress Tool Configuration window will appear.
- Click on “Create New Credential” in the Select Credential Tab.

- Now, the WordPress connection window will appear

Fill the fields:
- Website URL: Your full domain (e.g., https://yourdomain.com).
- Username: Admin username.
- Password: Not your login password. You’ll use an Application Password. (Check next step)
Step 4: Generate WordPress Application Password
WordPress is smart; it never lets external apps use your primary password.
It allows us to generate Application Passwords, which work like API keys.
Steps:
- In WordPress, go to Users → Profile.
- Scroll down to Application Passwords.
- Enter a name: “MCP Server.”
- Click Add New Application Password.
- Copy the password immediately.

Common mistake:
If you don’t see Application Passwords, you likely don’t have HTTPS enabled or you’re on an outdated WP version (<5.6).
Back in n8n:
- Paste the password
- Click Save → Should see Connection Successful

- Close the credential window and go back to the WordPress Configuration Window.
Step 5: Configure WordPress Actions
This is where you decide what Claude is allowed to do.
- In the WordPress window, set the Resource you want to control: Posts, Pages, Users, or custom API

- Set Operation: Create, Update, Delete, Get.

- Add a clear Event Title, e.g., “Create a Post in WordPress.”

Pro Tip: Click the AI icon next to the title field and let n8n generate the perfect title.
If you want Claude to manage multiple things:
- Posts
- Products
- Users
Just click + again from step 3 and chain more WordPress nodes.
Step 6: Activate Your Workflow
- Click Save Workflow.
- Name it: “Connect WordPress with Claude AI using n8n MCP.”
- Turn the toggle ON.

You want to see a green Active badge. No Active badge = no automation.
Step 7: Install Required Software
You need two things:
Why desktop?
Because MCP doesn’t work in the browser. Anthropic built protocol-level access only into the desktop version.
Step 8: Get Your n8n MCP URL
Back in your n8n workflow:
- Double-click the MCP Server Trigger node.
- Click Production URL.
- Copy the long URL (your unique MCP endpoint).
Treat this link like a password; it connects straight to your automations.
Step 9: Configure Claude’s MCP Settings
- Open Claude Desktop.
- Menu → File → Settings.
- Go to the Developer Tab.
- Click Edit Config.

Claude will open a folder. Open a file called:
claude_desktop_config.json
This is where we define external tools.
Step 10: Add n8n Connection Code
Paste this into your JSON file:
{
  "mcpServers": {
    "n8n": {
      "command": "npx",
      "args": [
        "-y",
        "mcp-remote",
        "YOUR_N8N_MCP_URL_HERE"
      ]
    }
  }
}
Replace YOUR_N8N_MCP_URL_HERE with the production URL from Step 8.
3 critical rules:
- Don’t remove commas.
- Don’t change quotation marks.
- Don’t add trailing spaces.
If in doubt, validate at jsonlint.com.
Example with real URL:
{
  "mcpServers": {
    "n8n": {
      "command": "npx",
      "args": [
        "-y",
        "mcp-remote",
        "https://wordvell.app.n8n.cloud/mcp/97efa11e-e122-4a5e-a499-083455cf9cf8"
      ]
    }
  }
}
Step 11: Restart Claude (Sometimes your System)
Quit Claude completely
Reopen Claude.
You should now see an n8n tool icon inside the input bar.

If it doesn’t show:
- Full system restart (yes, sometimes required)
- Check JSON syntax
- Verify Node.js installation
Step 12: Run a Test Command
Try one of these:
- “Create a draft WordPress post titled ‘AI Automation Guide’.”
- “List my 5 recent posts from my WordPress site.”
- “Update the post titled ‘X’ and add the tag ‘AI Tools’.”
What happens next:
- Claude recognizes n8n as a tool.
- Executes the workflow.
- Returns a success message with IDs or output.

If it works, you’ve officially connected Claude AI → n8n → WordPress.
Your site is now AI-powered.
And you built it yourself.
Advanced Implementation: Unlock the Full Power of n8n MCP
Up till now, you’ve seen Claude create posts, update content, and manage WordPress like a polite assistant.
But with n8n’s visual workflow engine, you can push this way further into full-blown multi-tool automations that work across your entire business.
A. Connect Multiple Tools in One Workflow

Imagine this.
You type a single command into Claude:
“Create a blog post about sustainable design, generate a cover image, and schedule a social media announcement.”
And boom, Claude triggers an n8n workflow that:
- Creates the WordPress post
- Generates a featured image (via DALL·E or Stable Diffusion node)
- Craft social media captions
- Schedules posts on X, LinkedIn, or Facebook
- Notifies your team on Slack
All from one command. No clicking around. No jumping between apps.
How to build this:
- Add additional nodes after your WordPress action (Google Sheets, Slack, Email, DALL·E, etc.)
- Use n8n’s data mapping to pass WordPress post IDs, URLs, or metadata to the next steps
- Add conditional logic, e.g., IF post status = published → THEN notify team
Example Workflow Chain:
Claude → n8n MCP → Create WordPress Post → Extract Post Data → Generate Image → Draft Social Media Text → Publish → Slack Notification
B. Multi-Site Management (Perfect for Agencies & Enterprises)
If you manage several client sites, MCP becomes a superpower.
You can connect multiple WordPress sites to a single Claude instance using n8n, each with its own workflow.
Setup Strategy:
- Create one n8n workflow per client (unique WordPress credentials).
- Name the MCP servers clearly inside
claude_desktop_config.json:
{
  "mcpServers": {
    "client-a-wordpress": { ... },
    "client-b-wordpress": { ... }
  }
}- In Claude, specify which site you want to use:
“Using client-a-WordPress, create a post about the benefits of solar energy.”
It’s shockingly smooth.
Agencies love this because it lets one content manager operate multiple client sites without ever logging in manually.
Data Privacy, Security & Compliance Considerations
Let’s address the elephant in the room: when you connect Claude to WordPress, you’re literally giving an AI the keys to your website.
That sounds scary because it should be. But with the right setup, it’s not just safe… It’s often safer than handing access to a human team member.
Here’s how to do it responsibly.
A. What Data Actually Gets Shared
Most people assume Claude gets full access to their site. Not true.
Here’s the transparent breakdown:
What Claude sees:
Only the data you explicitly request through your MCP commands, such as post titles, content bodies, user roles, etc. Claude doesn’t “browse” your site or scan your database.
What n8n accesses:
Only the specific WordPress REST API endpoints you configure. If you don’t add a “delete user” node, n8n can’t delete users. Simple as that.
Where data is stored:
n8n logs workflow executions (you can disable or limit this). Claude does not store MCP interaction data as per Anthropic’s policy.
(If you want to dive deeper, Anthropic’s privacy docs explain this clearly.)
This transparency alone brings peace of mind to most creators.
B. Security Best Practices
Here’s your no-nonsense security checklist:
- Use WordPress application passwords, never your main admin password
- Use an Editor-level account, not Administrator, unless a workflow truly needs it
- Rotate application passwords quarterly
- Enable and monitor n8n execution logs for unusual activity
- Use a self-hosted n8n if your site handles sensitive information
Pro Security Tip:
Create a dedicated WordPress user just for Claude/n8n with the minimum permissions required. Treat it like a service account, because it is.
C. Compliance for Business Use
If you’re using this setup in a business or client environment, here are a few must-follow rules:
- Avoid processing personal user data (emails, addresses, support tickets) unless necessary
- Clear or limit n8n’s data retention if you deal with customer information
- Review the Terms of Service for Anthropic + n8n for commercial or enterprise usage
One security consultant told us something that stuck:
“AI doesn’t make your system insecure. Bad configuration does.”
Follow the checklists above, and you’ll be on the safe side of automation.
Troubleshooting Common Issues: Quick Fixes for 5 Common Problems
Even with a clean setup, something might break at some point. Don’t panic.
Here are the five issues faced by most people and the fastest ways to fix them.
1. “n8n icon doesn’t appear in Claude.”
Check: JSON syntax in your config file (validate with any online JSON checker).
Check: Node.js is installed through this command in your command line (node --version).
Fix: Restart your entire computer, not just the Claude app.
2. “Connection successful, but commands fail.”
Check: Your n8n workflow is Active (toggle must be ON).
Check: Your WordPress application password was copied exactly, no trailing spaces.
Fix: In n8n, reopen your WP credentials → click Test to confirm connection.
3. “Claude says it can’t perform that action.”
Reason: You haven’t added the required WordPress action node in your workflow.
Fix: Add the missing operation (Create/Update/Delete/etc), save, and reactivate.
4. “Workflow executes, but nothing happens in WordPress.”
Check: WordPress node settings (correct resource + operation).
Check: n8n execution logs for error messages or failed branches.
Fix: Confirm your WordPress site is publicly accessible (not in maintenance mode or blocked by security plugins).
5. “npx command not found.”
Reason: Node.js isn’t installed or wasn’t added to PATH.
Fix: Reinstall Node.js and ensure “Add to PATH” is checked during installation.
Conclusion: What’s Next
You’ve officially connected Claude AI to WordPress through n8n’s MCP server.
That means your AI assistant can now manage posts, users, products, and workflows without you ever opening the WP dashboard.
Now the fun part begins.
Next Steps
- Experiment with commands:
Create drafts, update categories, manage WooCommerce inventory, or fetch analytics. Just talk to Claude. - Build complex workflows:
Add conditional logic, automate social posting, or chain AI tools for end-to-end publishing. - Explore more integrations:
Connect Claude to Google Sheets, Slack, Gmail, Notion, or your CRM because n8n supports 400+ services.
A Final Thought
The real win isn’t just saving time.
It’s redefining how you interact with your website.
What once took 20 clicks and three tabs now takes one clear sentence.
If you build something cool or hit a weird edge case, drop it in the comments. We’d love to see how you’re using AI + MCP inside your WordPress workflow.
Want more guides like this?
Subscribe to our newsletter for deep WordPress tutorials, AI/MCP automation strategies, useful resources, and the latest WordPress news.