Discover the
Modern
WordPress with WordVell
How to Connect Claude AI with WordPress Using OttoKit MCP Server (A Complete 13 Step Guide for Full Automation)
Let’s suppose… You type a simple prompt to AI:
- Lists the top-selling products for the week
- Create a discount coupon “30OFF” for 30% off on all products on New Year’s Eve.
- Raise WooCommerce Product prices by 10%
- Write and publish a blog post
And it’s all done by AI automatically in seconds.
Sounds like science fiction? It’s not. This is the power of the Model Context Protocol (MCP). MCP gives AI models secure action-level access to your data and tools.
Before MCP, AI agents like Claude or ChatGPT could only brainstorm ideas, write text, or answer questions. They couldn’t touch your site, change any data, or take any actions.
Now, with MCP, they can act. You can automate content, products, orders, and much more with MCP.
In this guide, we’ll break down what MCP is, why it’s a game-changer for WordPress, and walk you step by step through connecting Claude AI with WordPress using OttoKit MCP Server.
By the end, you will be able to automate tasks in WordPress with AI Prompts.
Let’s understand the MCP concept…
What is Model Context Protocol (MCP)?
In simple terms, MCP is a standardized bridge between AI models and the tools, apps, or data resources you use every day, like your WordPress site or WooCommerce store.
Think of it as giving your AI the “keys or permission” to actually take action by understanding your context, not just chat based upon generalized data.
How does it work? MCP creates a standardized way for AI to understand context, access your site’s data, and perform tasks safely.
No messy custom code or endless API calls.
Before MCP, connecting AI to your site depended on building complex integrations of APIs for every little action.
Now, the AI knows what it can do and how, using a standard Model Context protocol (MCP).
Here’s an Example?
Ask Claude to list all pending WooCommerce orders.
With MCP, it can fetch that data instantly and display it to you in a beautiful way, without requiring you to make API requests.
It’s fast, reliable, and far easier than the old way. MCP is the smarter, simpler alternative to traditional APIs, opening automation possibilities you couldn’t dream of before.
Benefits and Use Cases of MCP for WordPress
With MCP plugged into your WordPress, you’re not just saving clicks, but you’re saving hours.
Imagine never having to update prices, fix metadata, or publish drafts manually again.
AI does it for you.
Here’s what you can automate today:
- Auto-publish posts when drafts reach a set quality score.
- Update WooCommerce product prices or stock in bulk via a single command.
- Let AI respond to customer queries using real order data.
- Generate SEO titles, slugs, metadata and content automatically.
- Even monitor your site’s health and let AI flag outdated plugins before they break something.
MCP doesn’t just make your site smarter, but it also makes it self-managing.
How to Connect Claude AI with WordPress & WooCommerce via OttoKit MCP (Step-by-Step)
Here’s the fun part: connecting Claude with WordPress through OttoKit MCP Server.
It’s easier than it sounds. No coding marathon, no tangled APIs.
Just follow these steps, and your AI-powered WordPress will be live before your coffee cools.
Step 1: Create Your OttoKit Account

Head over to OttoKit Sign Up Page.
Enter your details, verify your email, and you’ll land in the OttoKit dashboard.

This will be your new AI control room.
From here, you’ll create, manage, and monitor your MCP servers.
Step 2: Navigate to the MCP Tab
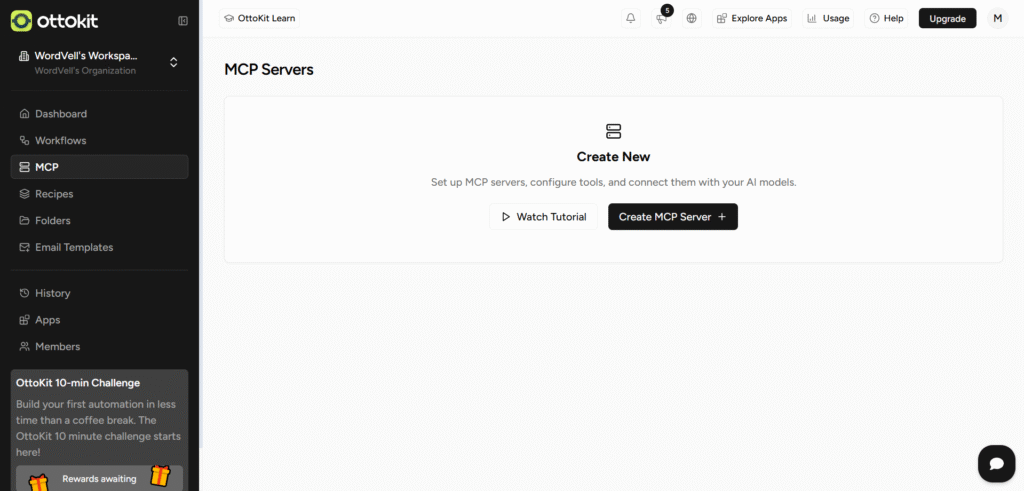
On the left menu, click MCP.
It is a place where you will build connections.
You’ll soon create an “MCP Server” here that will bridge and let Claude AI talk directly to your WordPress site.
Step 3: Create Your MCP Server
Now, Click Create MCP Server.
Give it any name you like, maybe “WordPress & WooCommerce”.
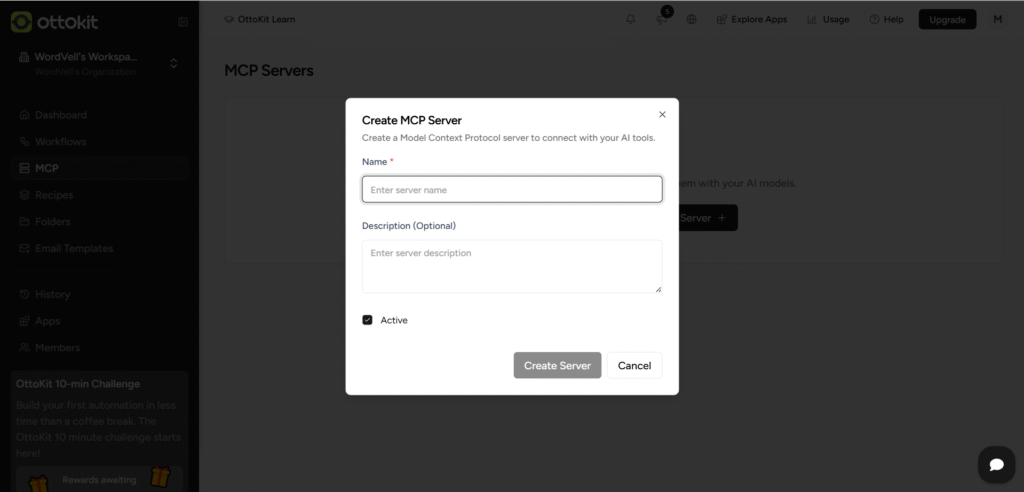
Click on the Create Server Button to proceed.
This server will act as the central brain linking Claude AI and your website.
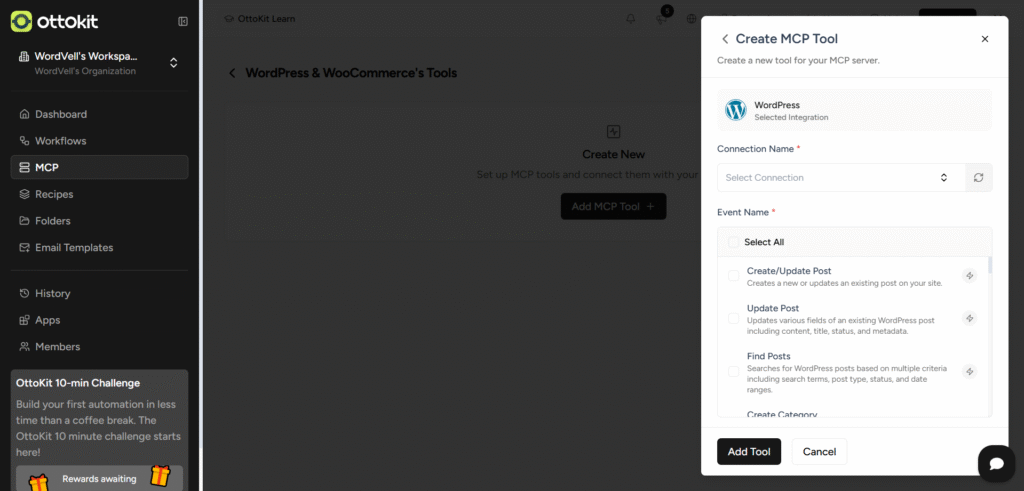
Step 4: Add the WordPress MCP Tool
Inside your new server, hit Add MCP Tool.
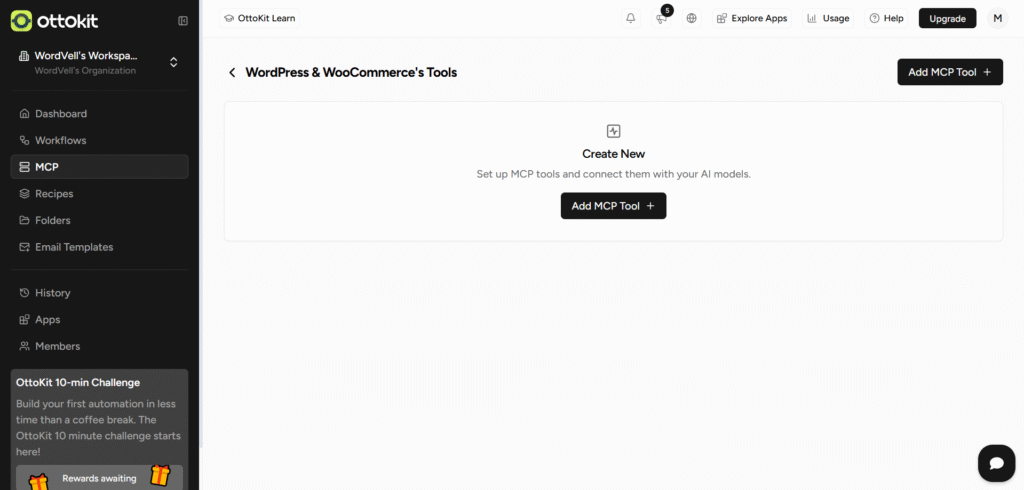
Search “WordPress,” then select WordPress.
The window will appear, where you will connect to your WordPress site and select the WordPress events you want to control with AI.
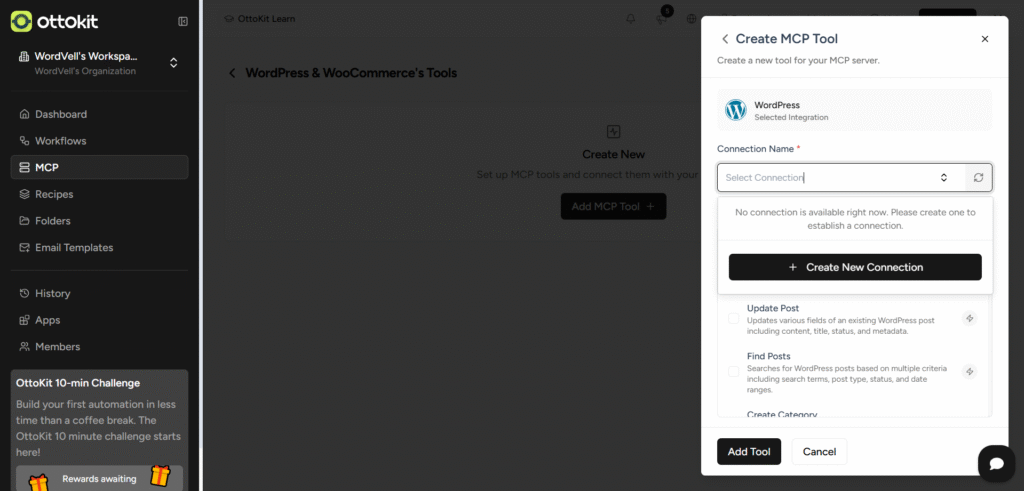
Step 5: Connect Your WordPress Site
You’ve got two quick options to make connections:
Option A: Through URL & Application Password
- In the OttoKit panel open in the previous step, click on the Connections tab and then hit Create New Connection
- Enter your Connection Title, WordPress site URL, and WordPress Username.
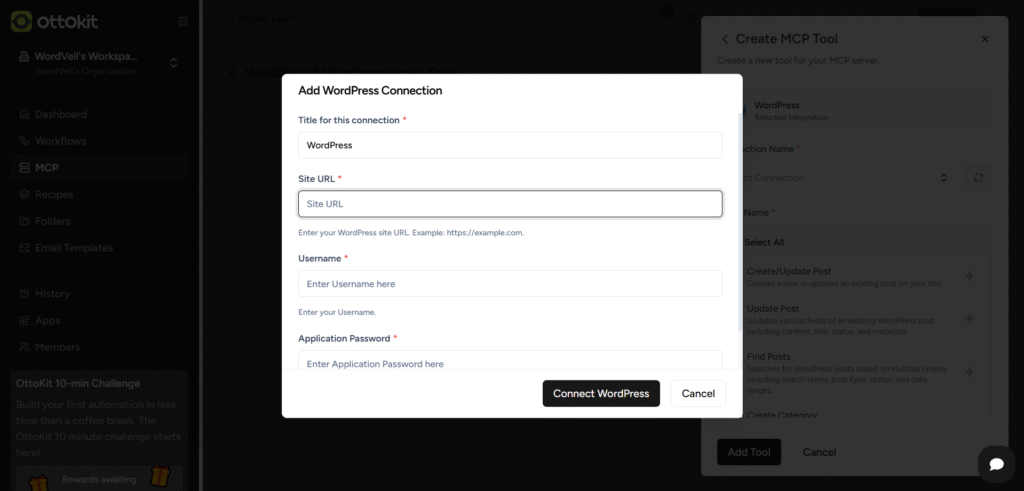
- For Application Password, go to the WordPress admin, then Users → Profile → Application Passwords.

- Create a new application password, copy it, and paste it into OttoKit.
Note: it will appear only once. So, make sure to copy it properly.
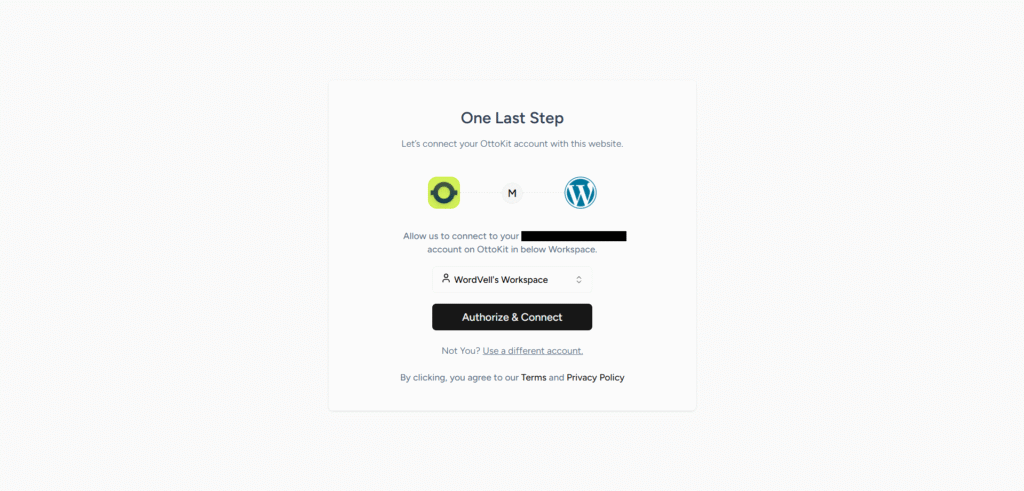
Option B: OttoKit WordPress Plugin
Prefer simplicity?
- Go to Plugins → Add New → “OttoKit.”
- Install and activate it.
- The setup wizard will open. Click on Get Started

- Log in to your OttoKit Account
- Click on Authorize & Connect. The plugin auto-links your WordPress with your OttoKit account with no passwords no copy-pasting.
Step 6: Refresh & Select Your Site
Back on OttoKit’s dashboard, hit the refresh icon next to the connection tab.
Click on the Connection Tab again. You’ll see your website listed there.
Select it and the connection will be done!
Step 7: Choose WordPress Events
Now, tell OttoKit which events you want Claude to control.
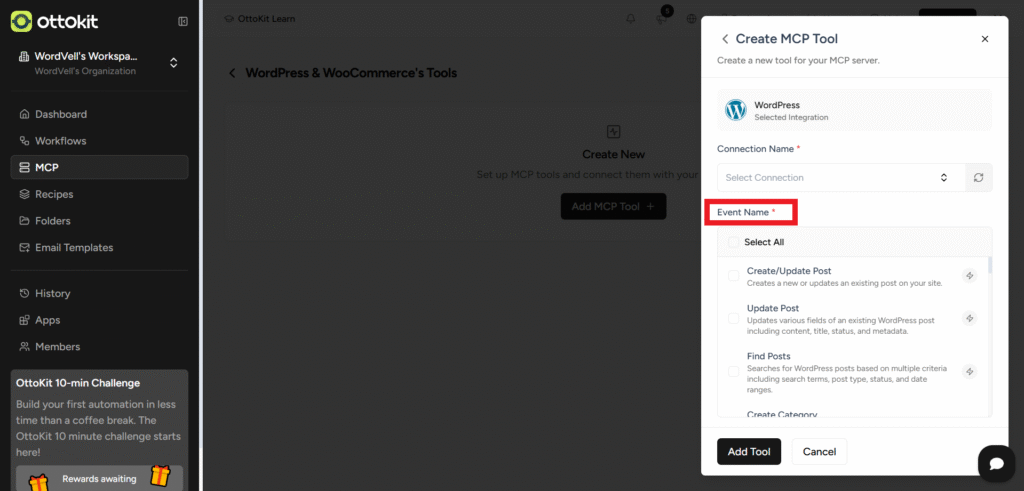
You can select specific actions like Update Post, Search Post by ID, or just select All.
And finally, click on the Add Tool Button at the bottom.
Note: Only selected events here will be executed by AI.
Step 8 (Optional): Add WooCommerce Events
If you’re running a WooCommerce store, you can also add WooCommerce events as well in the same MCP server.
- Follow the same steps from Step 4
- Search for WooCommerce and use the same WordPress connection
- Pick WooCommerce events like Order Placed or Product Updated.
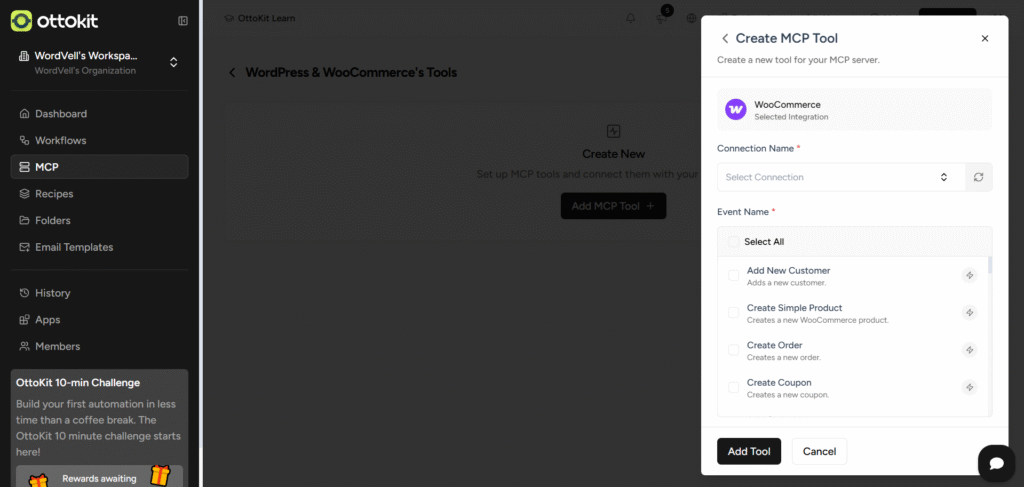
- Now, you can manage your WooCommerce store tasks along with WordPress using simple prompts.
Step 9: Configure the Server
Click on the MCP Tab again. Your server will appear there.
Click the three dots beside your new server → Click Configure.
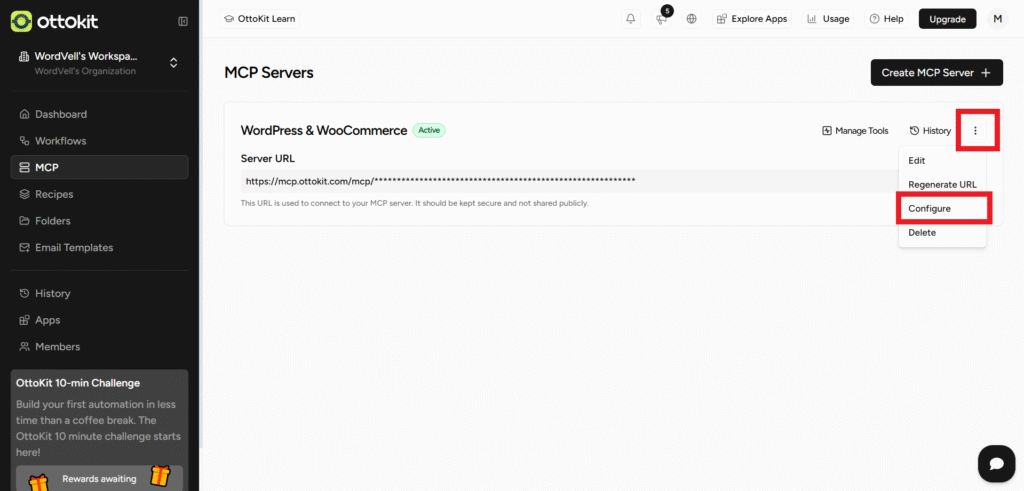
Select Claude AI as the platform.

OttoKit will generate configuration instructions and a code snippet for Claude. You can get it by scrolling down.
Step 10: Install Claude Desktop & Node.js
If you don’t already have them:
- Download Node.js (required for local connections).
- Install the Claude Desktop App to run AI prompts.
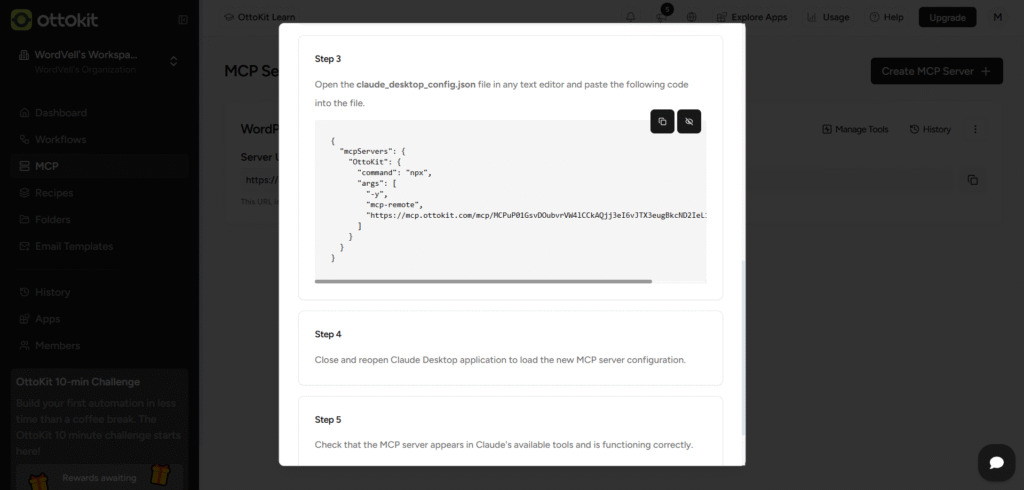
Step 11: Configure Claude
- Open the Claude App → Go to hamburger menu → File → Settings → Developer → Edit Config.

- Open
claude_desktop_config.jsonin a text or code editor. - Paste in the OttoKit configuration code you just generated.
- Save it and restart Claude Desktop. Sometimes you need to restart your system.
Step 12: Activate OttoKit MCP in Claude
- Under chat options, you’ll now see “OttoKit MCP.”

- Select it. You’ve just given Claude superpowers.
Step 13: Test the Connection
Let’s make sure everything’s working.
Try typing:
“List the titles of 5 recent Posts,” Or anything else you want.
If Claude fetches the real data from your site, then congratulations.

You’ve officially connected AI to WordPress.
From here, you can automate posts, manage products, or build custom workflows.
Your site just got its own digital operator, and it never takes a coffee break.
Quick Troubleshooting & Smart Tips
Hit a hurdle? Don’t panic, most connection issues have simple fixes.
First, make sure your WordPress URL uses HTTPS. OttoKit won’t connect to insecure (HTTP) sites.
Next, double-check your Application Passwords. They should only be created for trusted user roles, ideally Administrator or Editor, not for random accounts.
If your events aren’t firing, it’s usually because WooCommerce integration isn’t enabled. Go back to your MCP tool and toggle it on.
Still seeing connection errors? Restart Claude Desktop. It refreshes the MCP bridge and clears cached sessions.
Finally, open the Claude AI logs. They show detailed error messages, and they will be your best friend when debugging.
Once you fix the basics, everything syncs smoothly again.
Remember, MCP setups are light when configured right for work.
Advanced Implementation & Multi-Site / Enterprise Headless Use
Once you’ve nailed the basics, OttoKit MCP can be turned into a serious workflow engine.
You can connect multiple tools, such as Slack, Gmail, Notion, Google Sheets, and build automation chains that run across your entire digital stack.
Running a WordPress multisite network?
Good news, one MCP server can manage all sites at once. That means unified automation, centralized monitoring, and no repetitive setups.
For headless sites, MCP connects directly to your REST endpoints. Claude can create or update content on the backend without even touching your WordPress dashboard.
In enterprise setups, it gets even more powerful. You can bridge WordPress + CRM + CMS in one OttoKit server, giving AI seamless data flow across departments.
Just keep governance in mind, manage permissions, log activities, and scale responsibly. Because with great automation comes great accountability.
Data Privacy, Security & Compliance
Automation shouldn’t come at the cost of security. With MCP, you’re handing your AI real access, so guard it wisely.
Start by properly scoping your application passwords. Give Claude access only to what it needs, nothing more.
Over-permissioned accounts are the easiest security hole to miss.
Next, store only the minimum data in your AI transactions. Keep personal or sensitive information out of prompts whenever possible.
If your automations touch user data, remember GDPR and CCPA compliance. Always use informed consent and disclose AI involvement.
OttoKit helps here, too. Its audit logs record every action your MCP server performs, so you can track, trace, and verify AI behavior.
Finally, use capability rules to block risky commands before they execute. One misfired prompt shouldn’t change your entire store.
Safety and data privacy aren’t optional; it’s part of smart automation.
Final Words
WordPress automation isn’t a dream anymore; it’s a reality.
We’ve moved from plugin-based and manual workflows to AI-first operations where your site can act on your prompt.
With OttoKit and MCP, you can connect Claude or other AI models directly to your WordPress backend, giving you the power to automate tasks you used to click through manually.
Start small. Set up WordPress automation by following the steps as mentioned earlier. Once you see it run, you’ll never look back.
Because when your AI says “done” instead of you clicking through ten menus, that’s when you’ll know you’ve arrived.
Finally, for more WordPress AI + MCP automation strategies, e-guides, and the latest WordPress news, subscribe to our weekly newsletter.