Discover the
Modern
WordPress with WordVell

How to Develop a WordPress Plugin in 8 Steps (Everything You Need to Start WordPress Plugin Development)
Do you know, there are more than 60,000 free plugins on WordPress.org, which powers millions of websites worldwide.
Almost every feature you use in WordPress, from an elegant contact form to a full-scale ecommerce system, exists because of plugins.
But the real problem is that if you want to start developing WordPress plugins, you need to take the right path.
Otherwise, you will develop a broken plugin that will face file-path errors, misuse hooks, conflicts with themes and other plugins, or leave junk in the database after uninstall.
That’s why, in this guide, you’ll learn how to develop a WordPress plugin in 8 structured steps, including:
- Creating your first WordPress plugin file and folder structure
- Writing correct plugin headers so WordPress registers your plugin properly
- Using WordPress hooks to add and modify functionality safely
- Integrating core WordPress APIs for real-world features
- Applying clean architecture and coding best practices for scalability
- Referencing plugin files and directories the right way
- Implementing proper uninstall logic to avoid database clutter
- Publishing and sharing your plugin in the correct way
You’ll also discover common mistakes that silently break plugins and how professionals avoid them.
Our promise is simple: by the end, you’ll gain enough knowledge to build your own first WordPress plugin.
Let’s start by answering the first big question: what exactly is a WordPress plugin?
What Are WordPress Plugins?
At its core, a WordPress plugin is a small software package that adds new functionality to your site without ever touching the WordPress core files.
Think of them as the “apps” for WordPress, just like you install apps on your phone to unlock new features.
In the same way, plugins unlock new powers for your website.
One of the reasons plugins are so popular is due to their plug-and-play nature.
You can install, activate, deactivate, or even delete them with just a few clicks as per your desire, with no risk to your core files.
They are also modular, meaning they extend WordPress without breaking its foundation.
There are two main types of plugins you will encounter:
Utility Plugins:
These are Lightweight tools that often solve a single or a few problems, such as contact form builders, caching solutions, SEO optimizers, or table generators.
Complex & SaaS Styled Plugins:
These are Full-fledged platforms that transform your WordPress website into something entirely new, like WooCommerce (eCommerce) or LMS plugins (online courses)
In short, plugins are the building blocks of a custom WordPress experience. Whether you want to add a tiny feature or create an entirely new system, plugins are your go-to solution.
Why You Have to Develop WordPress Plugins? The Fastest Path to Problem Solving & Income
There are two powerful reasons why developers build plugins.
First, plugins let you add new functionality without ever touching WordPress core files.
This means your site stays unchanged and undisturbed while still doing exactly what you want.
Second, plugins empower you to solve real problems.
Maybe you solve client needs with a custom feature, or you have noticed something missing in the ecosystem.
By coding it once, you can share it with the open-source community and even monetize it by offering premium or freemium versions.
The personal benefit is huge too.
Learning plugin development gives you a deeper mastery of WordPress internals, making you a more professional and in-demand developer.
Think of it this way: plugins allow you to convert your idea into code that could be loved and used by thousands of people around the world.
From Simple to Complex Plugins
Every plugin begins with a simple idea.
For example, the classic “Hello Dolly” plugin consists of only one file, and it prints random song lyrics in your dashboard.
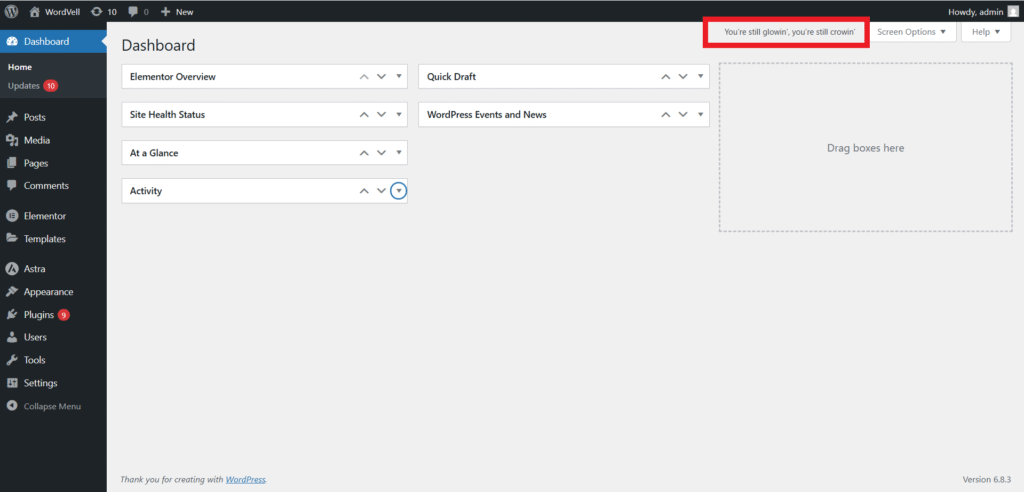
Similarly, you can write a one-file plugin that displays “Hello World” in your site’s footer.
On the other end of the spectrum, you will find WooCommerce and many other massive plugins with hundreds of files, hooks, APIs, and integrations.
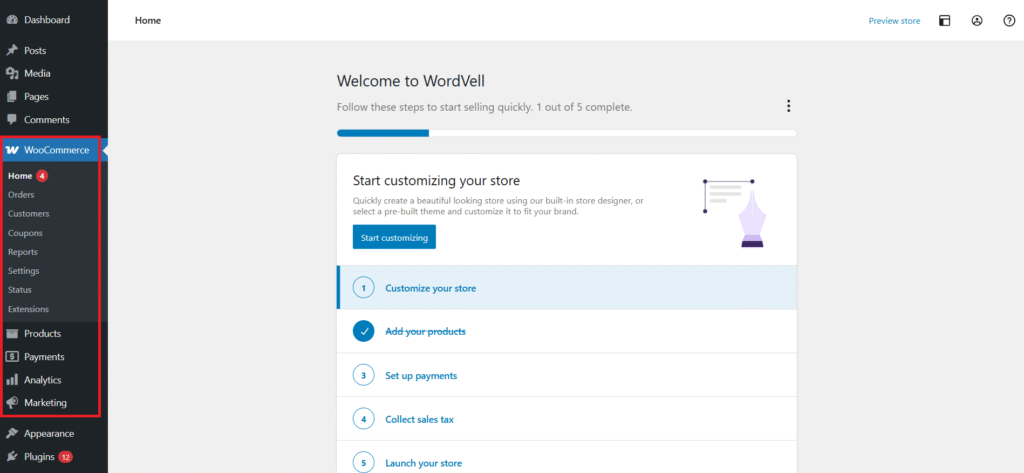
It doesn’t just add a small feature, but it transforms WordPress into a completely innovative platform.
The key lesson is to start simple and scale with confidence.
By beginning with simple plugins, you will understand how the system works before moving on to complex projects.
Getting Started With WordPress Plugin Development: How to Create Your First WordPress Plugin (Step-by-Step)
Now that you know what plugins are and why they are important.
So it’s a time to roll up your sleeves and create your very first plugin.
Step 1: Create a Plugin File or Directory
As per the WordPress architecture, all plugins reside inside the /wp-content/plugins/ directory of your WordPress installation.
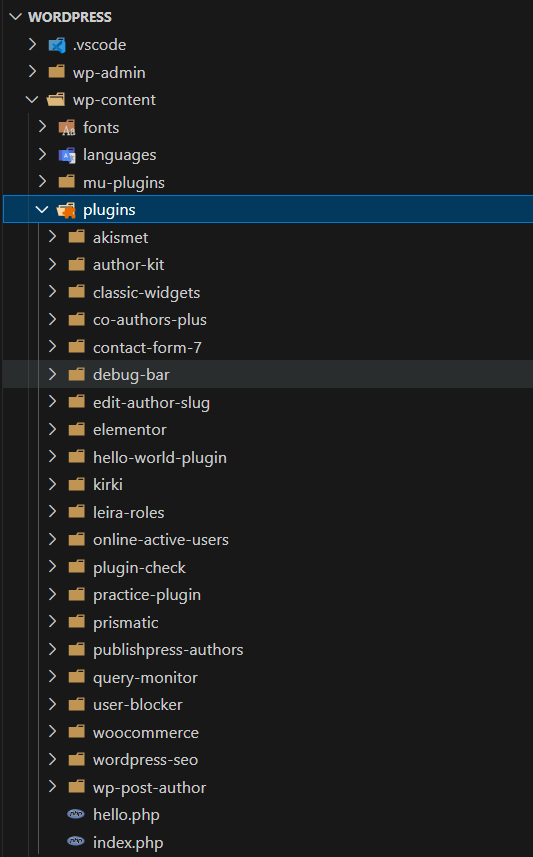
Inside this folder, you have two choices for creating your own plugin:
Method 1: Single Plugin PHP File
This method is perfect for small projects, experiments, or learning purposes.
In which you just drop one PHP file into your plugins folder, add a Plugin Header to this PHP file, and WordPress will recognize it automatically inside its plugins section.
Option 1: Place main file directly in plugins folder
---------------------------------------------------
wp-content/
└── plugins/
    └── my-first-plugin.php   ← Main plugin file
By this approach, you are limited to a one-file plugin only.
If you want to build a large or complex plugin with multiple files, you have to use the second approach.
Method 2: Dedicated Folder with Structured Files (Recommended):
This is the professional way to create your plugin.
You create a folder for your plugin inside the plugin folder and then create your plugin PHP file inside your plugin folder.
This will keep your plugin files separate for better organization, and you can also add multiple files in your plugin for PHP, CSS, JavaScript, and images.
Here’s an example structure for a clean start:
Option 2: Create a plugin folder and put the main file inside
-------------------------------------------------------------
wp-content/
└── plugins/
    └── my-first-plugin/      ← Plugin directory
        └── my-first-plugin.php   ← Main plugin file
This ensures your plugin is neatly separated and easy to maintain.
Exercise: Create a folder called my-first-plugin inside /wp-content/plugins/. Then, add a file named my-first-plugin.php.
Don’t worry, it will not break anything. This is the foundation of your first real plugin.
Now, next, we will learn to add a Plugin Header to your main plugin file so that WordPress can start recognizing your plugin.
Step 2: How to Write Plugin Headers So WordPress Lists Your Plugin Correctly
Before WordPress can recognize your plugin, you need to add a plugin header, which is a block of PHP comments at the very top of your main plugin file.
This header tells WordPress essential information about your plugin, like its name, description, version, and author.
Without it, WordPress won’t even know your plugin exists.
At the bare minimum, your plugin needs a Plugin Name line only to get recognized, but it’s best to provide more details for clarity and professionalism.
<?php
/*
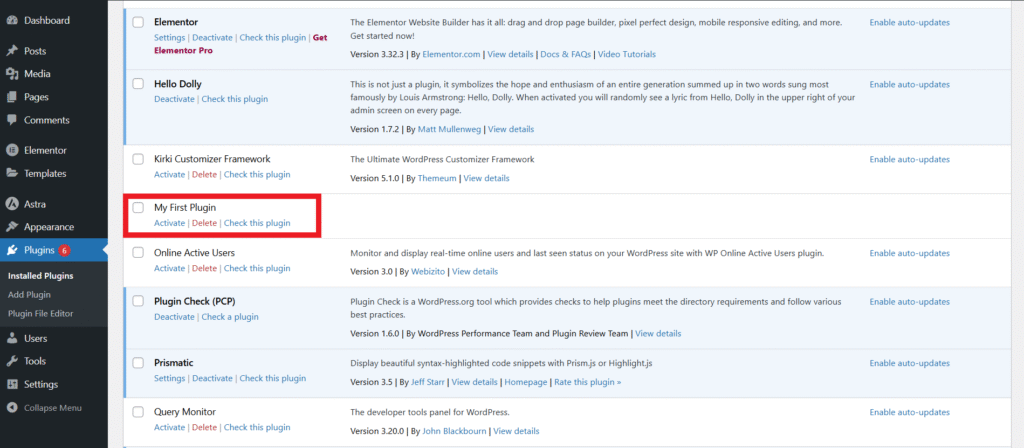
* Plugin Name: My First Plugin
*/With just that line, your plugin will show up in the WordPress admin’s Plugins screen.
But to be professional (and to make your plugin useful to others), you should use additional header fields.
Here are the available header fields you can include:
- Plugin Name: The name of your plugin. This is required.
- Plugin URI: A link to your plugin’s homepage or documentation.
- Description: A short explanation of what your plugin does (shows in the plugin list).
- Version: The current version of your plugin (e.g., 1.0, 1.1).
- Author: Your name or your company’s name.
- Author URI: A link to your personal or company website.
- License: The license under which your plugin is released (WordPress recommends GPL2 or later).
- License URI: A link to the full license text.
- Text Domain: Used for internationalization (making your plugin translatable).
- Domain Path: Specifies where the translation files are located in your plugin.
- Requires at least: The minimum version of WordPress required for your plugin.
- Requires PHP: The minimum PHP version needed.
- Update URI: Used for managing custom update sources.
Here’s an example with these header elements:
<?php
/*
* Plugin Name: My First Plugin
* Plugin URI: https://example.com/my-first-plugin
* Description: A simple example plugin that prints text in the footer.
* Version: 1.0
* Author: Your Name
* Author URI: https://example.com
* License: GPL2
* License URI: https://www.gnu.org/licenses/gpl-2.0.html
* Text Domain: my-first-plugin
* Domain Path: /languages
* Requires at least: 5.0
* Requires PHP: 7.4
*/
With this header in place, WordPress will display your plugin with all this information inside the Plugins dashboard.
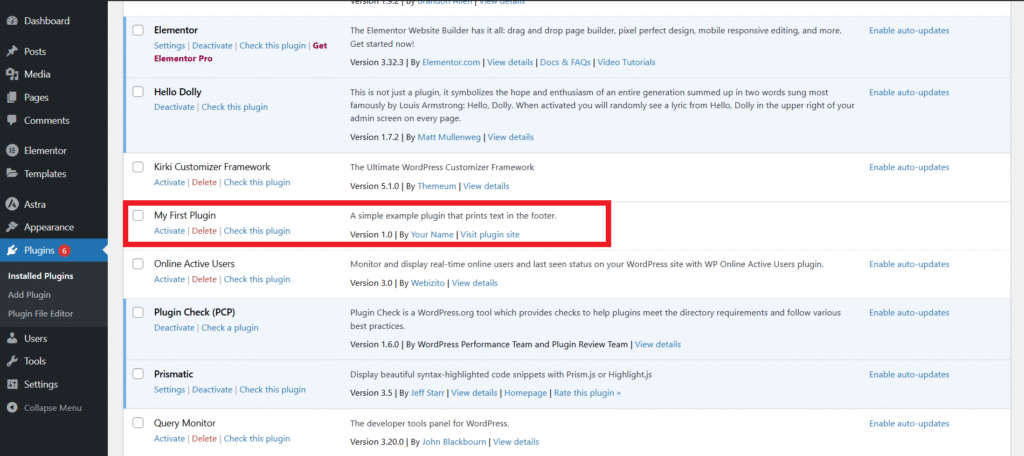
Exercise:
- Add your own header to my-first-plugin.php.
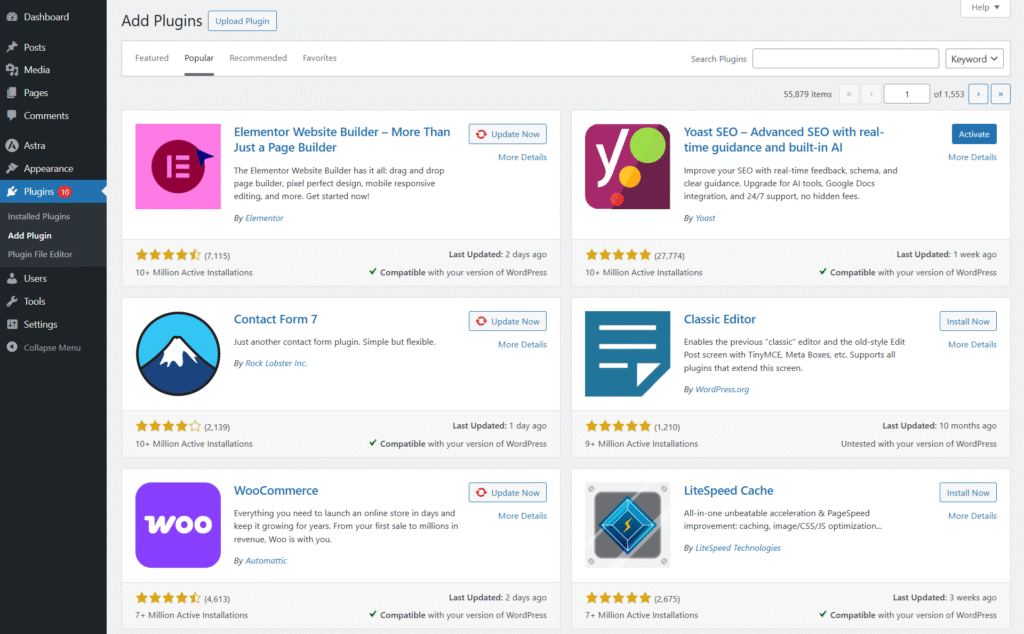
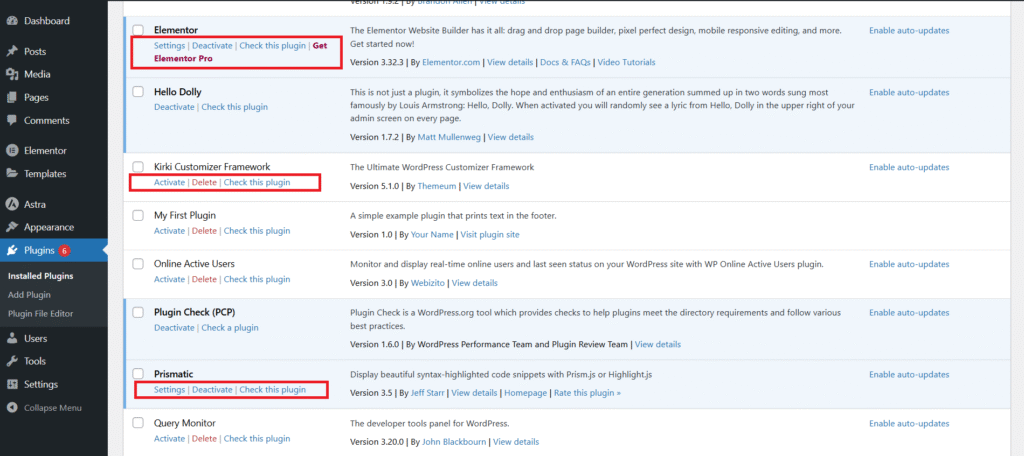
- Then, log in to your WordPress admin → Plugins, and refresh the page.
- You will see your plugin listed there with the name and description you wrote. Your first big milestone!
Now, your plugin is shown up in WordPress. But what does it offer? To answer this question, we need to add features to our plugin.
To add features to your plugin, you need to learn the use of WordPress Hooks. Let’s understand the hooks.
Step 3: Use WordPress Hooks to Add & Modify the Functionalities of WordPress
Plugins are powerful. But hooks are what give them these superpowers.
Let’s understand what hooks are…
Hooks are the specific points in the WordPress lifecycle that allow you to add your code at these points.
You can use hooks to add your own custom functionality to WordPress or to modify the core WordPress actions and data.
In simple terms, a hook is like saying: “Hey, I am reached at this specific point, do you want to run your function here?”
WordPress provides many hooks for you. But here are a few examples:
register_activation_hook()→ Runs code when your plugin is activated (e.g., create database tables, set default options).register_deactivation_hook()→ Handles cleanup tasks when your plugin is turned off (e.g., stop cron jobs, close connections).register_uninstall_hook()→ Executes when your plugin is deleted, letting you remove custom tables or settings.
For example:
// Run when plugin is activated
register_activation_hook( __FILE__, 'my_plugin_activate' );
function my_plugin_activate() {
    $log_file = __DIR__ . '/plugin-log.txt';
    $message  = "Plugin activated on: " . date( 'Y-m-d H:i:s' ) . "\n";

    // Example: Create a log file and add activatiion message to it.
    file_put_contents( $log_file, $message, FILE_APPEND );
}

// Run when plugin is deactivated
register_deactivation_hook( __FILE__, 'my_plugin_deactivate' );
function my_plugin_deactivate() {
    $log_file = __DIR__ . '/plugin-log.txt';
    $message  = "Plugin deactivated on: " . date( 'Y-m-d H:i:s' ) . "\n";

    // Example: Add deactivatiion message to log file.
    file_put_contents( $log_file, $message, FILE_APPEND );
}
This is just an example for you. In real plugins, you might use these hooks to:
- Create database tables.
- Add default options.
- Clear caches or scheduled tasks.
Custom Hooks
You can also create your own custom hooks, which allow other developers (or yourself) to extend your plugin:
do_action( 'myplugin_after_submit', $user_id );This makes your plugin flexible and developer-friendly.
Check out the detailed WordPress Hooks Guide here.
Step 4: Integrate WordPress APIs Take Your Plugins to the Advanced Level
The best thing about WordPress plugin development?
You don’t have to start from zero.
WordPress provides you with APIs (Application Programming Interfaces), which are prebuilt sets of functions to perform various actions.
This saves your time, prevents errors, and makes your plugin more secure and powerful.
Here are the must-know APIs for plugin developers:
- Options API – Store and retrieve your plugin’s settings from the database.
- Settings API – Create professional settings pages in the WordPress admin.
- Shortcode API – Add custom shortcodes (e.g., [myplugin_button]) that users can place anywhere.
- Widgets API – Build drag-and-drop widgets for sidebars and footers.
- REST API – Connect WordPress with modern apps, mobile apps, or third-party tools.
For example, here’s how you could use the Options API to save a setting:
// Save a setting
update_option( 'myplugin_color', 'blue' );

// Retrieve it later
$color = get_option( 'myplugin_color' );
Instead of writing your own database logic, you just call these WordPress functions to perform these actions.
So, these APIs are your shortcut to writing clean, secure, and scalable plugins.
Note: Don’t get overwhelmed by these API concepts. For now, just understand the basics. Once you’re familiar with the basics and hooks, move towards learning and implementing them.
Step 5: Follow Good Architecture & Best Coding Practices to Prevent Errors and Scalling Problems
A one-file plugin is fine for learning.
But as your code grows, having a clean structure and best practices becomes critical.
Poorly organized plugins might still “work,” but they’ll be a nightmare to maintain, debug, or share.
Let’s break down the key principles of solid plugin architecture:
Avoid Naming Collisions to Prevent Conflicts
Since WordPress loads code from thousands of plugins and themes, naming conflicts are common.
To prevent them, you can use these two approaches:
Procedural Approach:
In this approach, you have to prefix all your functions, constants, and variables with your plugin name to prevent conflicts
For Example, you will name your functions like this: myplugin_register_settings() instead of register_settings().
Here you can see the use of a procedural approach:
<?php
/*
Plugin Name: My First Plugin
Description: Example using procedural approach
Version: 1.0
Author: Your Name
*/

// Activation hook
register_activation_hook( __FILE__, 'my_first_plugin_activate' );
function my_first_plugin_activate() {
    add_option( 'my_first_plugin_message', 'Plugin was activated successfully!' );
}

// Deactivation hook
register_deactivation_hook( __FILE__, 'my_first_plugin_deactivate' );
function my_first_plugin_deactivate() {
    delete_option( 'my_first_plugin_message' );
}

// Show admin notice if message exists
add_action( 'admin_notices', 'my_first_plugin_notice' );
function my_first_plugin_notice() {
    if ( $msg = get_option( 'my_first_plugin_message' ) ) {
        echo '<div class="notice notice-success is-dismissible"><p>' . esc_html( $msg ) . '</p></div>';
    }
}
OOP Approach:
In this approach, you will use classes or namespaces to isolate your code.
When we use classes or namespaces with our plugin name, then code inside these classes or under these namespaces becomes automatically affiliated or associated with your plugin, and you also don’t need to prefix the code.
This is the same above code formatted with an OOP approach:
<?php
/*
Plugin Name: My First Plugin
Description: Example using namespace and class
Version: 1.0
Author: Your Name
*/

namespace MyFirstPlugin;

class Plugin {

    public function __construct() {
        register_activation_hook( __FILE__, [ $this, 'activate' ] );
        register_deactivation_hook( __FILE__, [ $this, 'deactivate' ] );
        add_action( 'admin_notices', [ $this, 'admin_notice' ] );
    }

    public function activate() {
        add_option( 'my_first_plugin_message', 'Plugin was activated successfully!' );
    }

    public function deactivate() {
        delete_option( 'my_first_plugin_message' );
    }

    public function admin_notice() {
        if ( $msg = get_option( 'my_first_plugin_message' ) ) {
            echo '<div class="notice notice-success is-dismissible"><p>' . esc_html( $msg ) . '</p></div>';
        }
    }
}

// Initialize plugin
new Plugin();
Here, the use of a namespace with the plugin name at the top eliminates the need to prefix everything else with the plugin name.
Note: To implement this approach, you must have a grip on the OOP concepts in PHP.
Organize Your Files to Scale Smoothly
A professional plugin should have a clear folder structure to facilitate scalability.
For example, you can structure your plugin like this:
my-plugin/
├── my-plugin.php // Main plugin file
├── includes/     // logic, classes, helpers
├── assets/       // CSS, JS, images
├── public/       // Store frontend files for public side
├── admin/        // Store frontend files for admin side
├── uninstall.php
This is not a hard-and-fast rule. You can structure your folders more efficiently, tailored to the needs of your plugin.
Architecture Patterns:
These are some best practices and preferences you can use in your plugin:
- Procedural vs OOP: Both work, but OOP offers better scalability and organization.
- Conditional Loading: Only load admin-specific files in the dashboard, and frontend files for site visitors. And avoid enqueuing all CSS and JS files for all pages, instead conditionally loading them for related pages only. This keeps your plugin lightweight.
- Secure Your Files: Prevent direct file access by adding this line to every PHP file:
if ( ! defined( 'ABSPATH' ) ) {
    exit; // Exit if accessed directly.
}
Use Boilerplates for Ready-made Solution
Instead of starting from scratch or reinventing the wheel, many developers rely on a WordPress Plugin Boilerplate.
It is a standardized template that includes all essential folders and classes, and also follows best practices so that you can start instantly and smoothly.
It helps you save time and ensures your plugin adheres to industry standards.
You can use this tool to generate a WordPress plugin boilerplate:

Exercise:
- Take your one-file plugin and restructure it into a folder
- Create an includes directory for logic
- Move assets (such as CSS/JS) into an assets folder.
Note: You can also download a boilerplate to start with.
This small step sets the foundation for building professional-grade plugins.
Step 6: Avoid Broken Plugins by Referencing the Files & Directories the Right Way
One of the most common mistakes beginner plugin developers make is hardcoding file paths
For Example, you add a direct and hardcoded path to include the CSS file
// Hook to enqueue styles
add_action('wp_enqueue_scripts', 'my_simple_css');

function my_simple_css() {
    // Direct path to CSS (hardcoded)
    wp_enqueue_style(
        'my-style',
        '/wp-content/plugins/my-plugin/css/style.css'
    );
}
This might work on your system, but it will break if WordPress is installed in a subfolder, the site uses a different URL structure, or is moved to another server.
That’s why WordPress provides built-in functions to handle file paths and URLs in a portable way.
Key Functions for File References
plugin_dir_path( __FILE__ )→ Returns the absolute server path to your plugin’s directory. Best for including PHP files.plugin_dir_url( __FILE__ )→ Returns the URL of your plugin’s directory. Use this for assets like CSS and JavaScript.plugins_url()→ A flexible function to generate plugin URLs (useful for shared/mu-plugins).
Related Constants
__FILE__→ Refers to the current file’s full path.__DIR__→ Refers to the current file’s directory path.ABSPATH→ Path to the WordPress installation root.
These functions and constants ensure your plugin works across any WordPress installation, regardless of custom configurations.
Example: Enqueuing CSS Correctly
// Hook to enqueue styles
add_action('wp_enqueue_scripts', 'my_better_css');

function my_better_css() {
    // Automatically gets correct URL, no matter where WP is installed
    wp_enqueue_style(
        'my-style',
        plugin_dir_url(__FILE__) . 'css/style.css'
    );
}
Here, plugin_dir_url( __FILE__ ) dynamically generates the correct URL to your plugin’s assets folder, ensuring your CSS loads no matter where WordPress is installed.
By consistently using these functions instead of hardcoding, you guarantee portability, flexibility, and fewer deployment headaches.
Read and get more useful resources for referencing the files
Step 7: Uninstalling Plugins the Right Way: Prevent Slow Sites and Database Clutter
Many beginners forget that a plugin should clean up itself when removed.
If you don’t, then leftover database entries, options, transients, or even custom tables will stay behind.
Over time, this database accumulation can slow down your site or even cause conflicts.
That’s why proper uninstall routines are important.
Deactivation vs. Uninstall (Know the Difference)
- Deactivation → Temporarily disables the plugin but keeps all data intact (ideal if a user plans to reactivate later without losing settings).
- Uninstall → Permanently deletes the plugin and all of its data from the database and file system. This ensures a clean reset.
How to Handle Uninstall in WordPress
WordPress gives you two reliable ways to wipe out your plugin’s data during uninstall:
uninstall.phpfile- Create this file in your plugin’s root directory.
- WordPress will automatically execute it when the plugin is deleted.
register_uninstall_hook()- Use this hook to add cleanup logic directly in your main plugin file.
- Useful if you want to keep everything in one place.
Example: Removing Options on Uninstall
<?php
// uninstall.php
if ( ! defined( 'WP_UNINSTALL_PLUGIN' ) ) {
    exit;
}

delete_option( 'myplugin_settings' );
delete_site_option( 'myplugin_settings' ); // For multisite
This snippet ensures your plugin erases its options, leaving no trace in the database.
Exercise
Create an uninstall.php file for your plugin.
- Add Removal code for any custom options or settings you added.
- Test by installing → activating → deleting the plugin.
- Confirm that no leftover data exists in the database.
By doing this, your plugin will leave WordPress exactly as clean as it found it, which is a sign of a professional developer.
Step 8: Licensing & Sharing Plugins: Protect Your Work and Grow Your Reach
When creating a plugin, you also need to decide how it will be licensed and distributed.
WordPress itself is released under the GPL (GNU General Public License). Because of this, all plugins distributed publicly must also be GPL-compatible.
This ensures freedom to use, modify, and share your work, while also protecting the open-source spirit of WordPress.
Why GPL?
- Keeps your plugin legally compatible with WordPress core.
- Encourages contributions and improvements from the community.
- Builds user trust because people know your plugin respects open-source principles
Example License Header (inside plugin file)
/**
 * This program is free software; you can redistribute it and/or modify
 * it under the terms of the GNU General Public License, version 2,
 * as published by the Free Software Foundation.
 *
 * This program is distributed in the hope that it will be useful,
 * but WITHOUT ANY WARRANTY; without even the implied warranty of
 * MERCHANTABILITY or FITNESS FOR A PARTICULAR PURPOSE. See the
 * GNU General Public License for more details.
 *
 * You should have received a copy of the GNU General Public License
 * along with this program; if not, see https://www.gnu.org/licenses/gpl-2.0.html
 */
Ways to Share Your Plugin
- WordPress.org Repository: Free distribution, maximum reach, and credibility.
- Private Projects: Build custom plugins and deliver them to clients.
- Premium Marketplaces: Sell plugins on platforms like CodeCanyon or use services like Freemius for licensing and billing of premium features.
By choosing the right license and distribution method, you decide how your plugin is used, shared, or monetized.
Because this defines your plugin’s future, whether it becomes a community contribution, a client-only tool, or a revenue-generating product.
Common Mistakes Beginners Make
When starting with plugin development, many beginners unknowingly take shortcuts or forget to follow best practices.
This creates long-term problems for them.
These mistakes may not break things right away, but they can affect performance, security, and user trust over time.
1. Editing WordPress Core Files
One of the biggest beginner mistakes is modifying WordPress core files directly.
It may seem like a quick fix, but the next update will overwrite your changes, and you will have to start from scratch.
Instead, the professional way you can use to extend WordPress is by using hooks (actions and filters) that let you modify WordPress behavior without touching core files.
2. Poor File Organization
Another common trap is to throw all your code into a single file or to organize your plugin in a poor file structure.
While this works for tiny experiments, it becomes a nightmare to debug or scale once your plugin grows.
A better approach is to split your code into logical modules, like separating admin functions, database operations, and front-end logic.
my-plugin/
├── my-plugin.php // Main plugin file
├── includes/     // logic, classes, helpers
├── assets/       // CSS, JS, images
├── public/       // Store frontend files for public side
├── admin/        // Store frontend files for admin side
├── uninstall.php
Not only does this keep things clean, but it also makes your plugin easier to maintain, grow, and collaborate on.
3. Forgetting Cleanup
Finally, many beginners forget that plugins should clean themselves up during deactivation and uninstallation.
If you leave behind database tables, options, or transients, then it clutters the site over time and can slow it down.
That’s why it’s crucial to include a proper uninstallation approach, whether through an uninstall.php file or the register_uninstall_hook() function.
A clean uninstall shows professionalism and earns user trust.
Avoiding these mistakes helps you write clean and professional plugins from the start.
Next Steps in Your Plugin Development Journey
You have already taken your first steps into the world of plugin development, but this is just the beginning.
To truly master WordPress plugins, here are the areas you should focus on next:
- WordPress Hooks (Actions & Filters): Dive deeper into hooks because it is the backbone of WordPress extensibility.
- Explore More WordPress APIs: Learn the Settings API, Widgets API, and REST API to build advanced functionality in your plugins.
- Security & Performance: Study the security and performance techniques such as input validation, output escaping, sanitization, and database query optimization to make your plugins professional-grade.
If you are still unsure about the full path to becoming an expert, don’t worry, we have got you covered.
Check out the [Complete Roadmap: How to Become a WordPress Plugin Developer] for a structured, step-by-step journey from beginner to advanced.
Conclusion
Let’s be real, you have now understood the basic concept of WordPress plugin development from what plugins are, why, and how to make them with proper headers, using hooks, and following best practices.
With this foundation, you are able to create your first plugin and confidently move forward.
All these concepts are part of the journey to make you a developer who can build real solutions, solve problems, and create features that others will love.
Remember, the best way to learn is to experiment.
Start with small plugins, refine your code, and gradually take on more complex projects.
Every plugin you write will sharpen your skills and bring you closer to mastery.
👉 Want to keep growing? Subscribe to our newsletter and get access to more guides, strategies, tutorials, developer resources, learning paths, and the latest WordPress news delivered straight to your inbox.